Matt Springfield is a singer/songwriter who raised a budget from more than 1.000 people in order to make his album “Erase All Data” that’s been recorded at Modern World Studios with top producer Greg Haver (Melanie C, Manic Street Preachers) and mastered by Ryan Smith (Bon Jovi) in New York City at Sterling Sound and released with Akamusic label. Matt is fascinated by new wave culture of the 80’s and 90’s/00’s rock. His influences are U2, The Killers, Muse, Oasis, Foo Fighters, New Order, Depeche Mode.
Matt has been after me for almost a year to do a free mix for him. I was always interested, and saved every submission he sent, but was just too busy to get around to mixing one of his songs. Finally had some time to work on one for him, and we picked PopLife! It’s a fun rock/pop type song, and he wanted to see if I could come up with a mix version that was more “rock” sounding than what he already had. I gladly accepted that challenge!
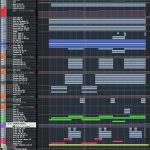
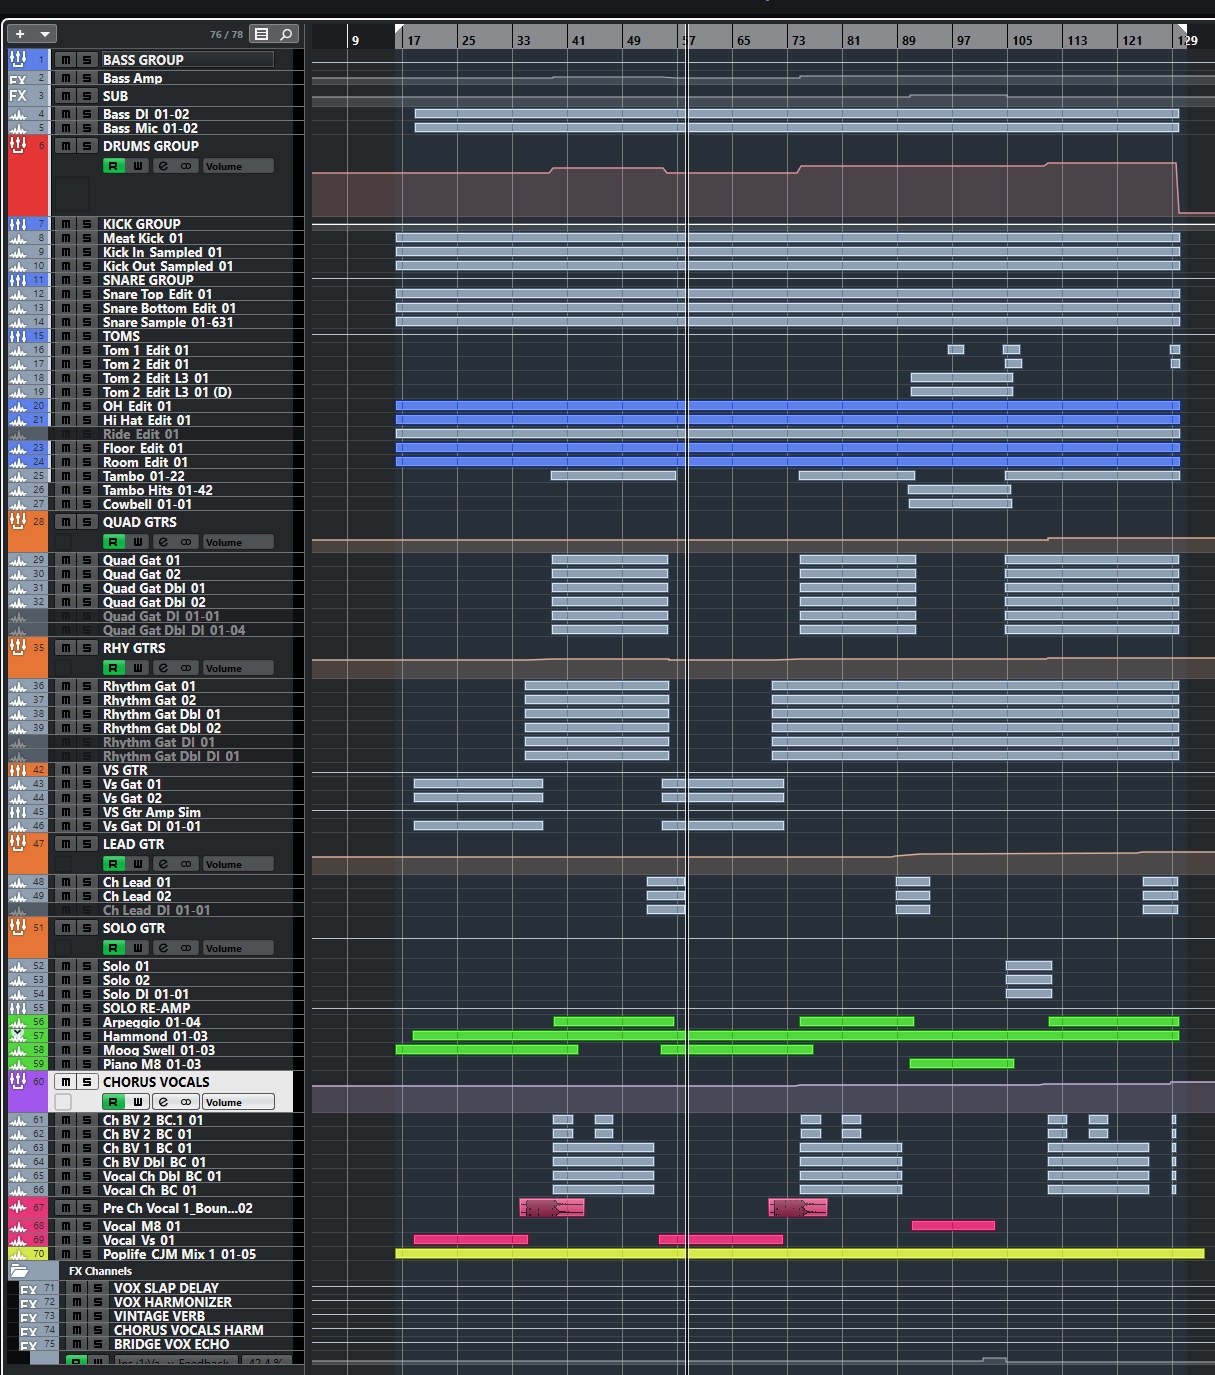
BASS OVERVIEW AND GROUP CHANNEL
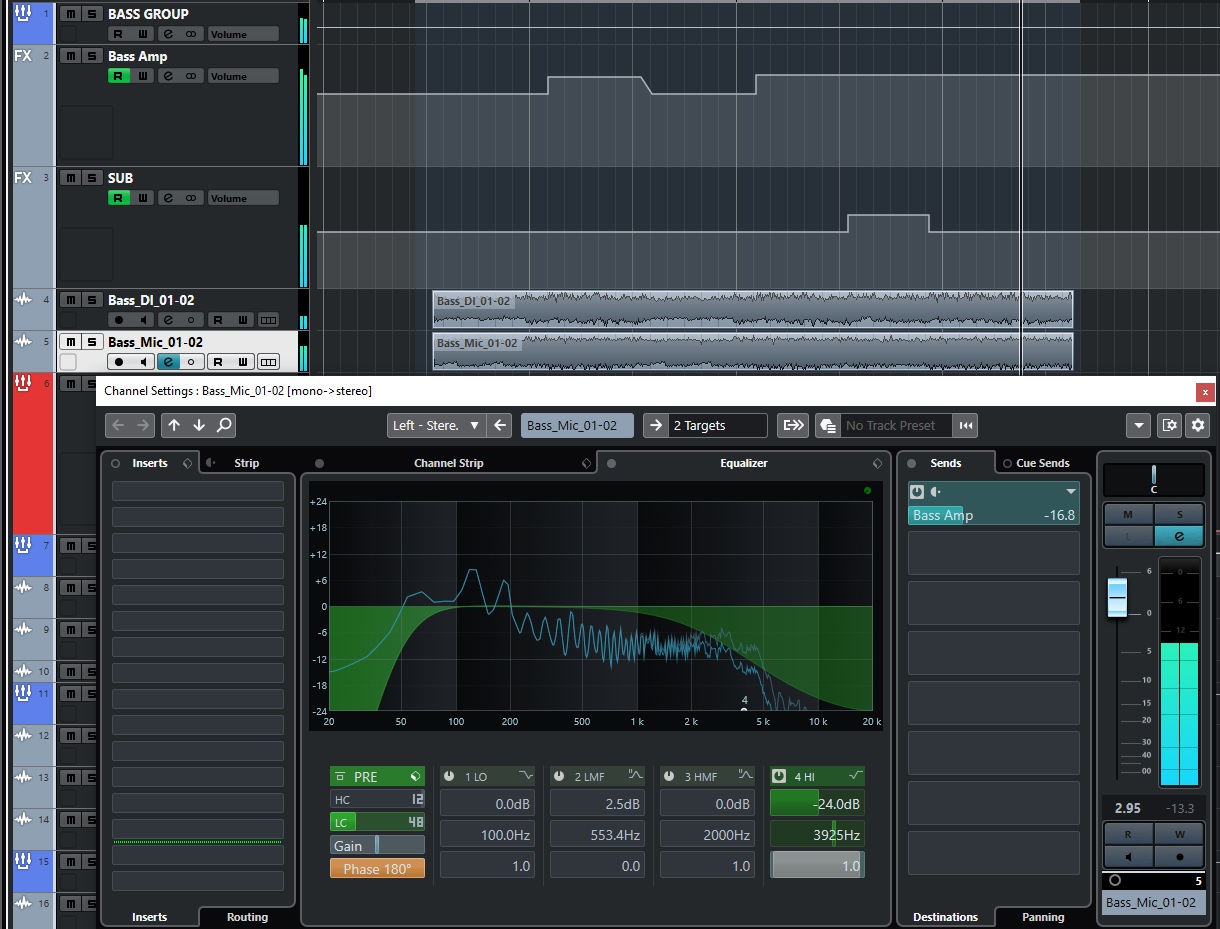
I was given two tracks for the bass guitar, a DI track and a Mic track. The Mic track had a good amount of fuzz/distortion on it already, so I didn’t feel the need to add any additional distortion, which I often do to help generate some additional mid/upper harmonics for the bass to cut through. I did, however, setup my own Bass Amp track on an FX channel, using NI Guitar Rig, and sent a blend of the DI and Mic tracks to it. In this case, my Bass Amp had a clean tone, and I was mostly using the mic/room model of the amp, along with a room type effect in the chain, to give the bass a bit of space and to round it out a bit. I controlled the amount of distortion I wanted overall by the blend of the send amounts from the 2 tracks to the bass amp channel. Later on I decided this mix could use some additional deep bass, so I added a SUB FX channel using the BX Subsynth plugin. For this, I only routed the DI track to it via a second send on that channel. I found a good blend for the majority of the song with the sub just filling in the bottom end a touch more. Then, I automated the return level on the Sub FX and brought it up significantly in the bridge section to give that part a bit more weight.
Instead of automating the group channel volume to bring the bass up and down throughout sections of the song, I only automated the volume on my bass amp sim return, and the sub synth return. Most of it was on the bass amp, which is what I do maybe 80% of the time in my mixes. Since my bass amp sim is set to be mostly mids, and usually some distortion/harmonics, on the busier/louder sections of the song (mostly choruses), I bring the amp level up to make the bass louder, and cut through more, in those sections, and then I bring it back down when the big wall of guitars drops out in the verses.
The only EQ I used was on the Bass Mic channel, just using the built-in Cubase Pro EQ. Since this was already a distorted/fuzz type sound, all I really wanted was the mid range to help the bass cut. I had to roll off the low end and also flip the phase so it wasn’t canceling out the low end from the DI track. I also rolled off quite a bit of the high-end from it, because I didn’t want the higher frequency “fizzy” sound of the distortion/fuzz to be audible and conflict with vocals and other instruments. The other “EQ” on this was really on the plugin Amp sound, which was also very mid-range focused and where I added a shelving EQ to roll off some high end from it as well (again, mostly to handle the fizzy frequencies from the distortion mic track feeding the amp sim).
If you solo up the bass and listen to it by itself, it’s very much mostly mid range, even with the sub synth I put in there. That’s really what you need for a heavy rock mix with lots of guitars and heavy drums. You need a lot of mid-range bit for the bass to cut through the mix, and your ears and brain will fill in the low end, and you’ll think there is a lot more low end bass than there really is. If, instead, you solo the bass and try to make it sound really fat and deep with tons of low end, then when you put the huge wall of guitars and drums in there, you won’t be able to hear the bass at all, and it will just muddy of your mix. So, the key, in a dense mix, is a lot of mid range and some distortion/edge to help it cut through (you don’t even notice the bass has distortion on it with everything else in the mix). If there are then sections that are sparse, with less guitars, you can automate some EQ, or automate some subs (like I did on this mix), to fill in the low end when there is more space in the mix for it.
DRUMS OVERVIEW AND GROUP CHANNEL
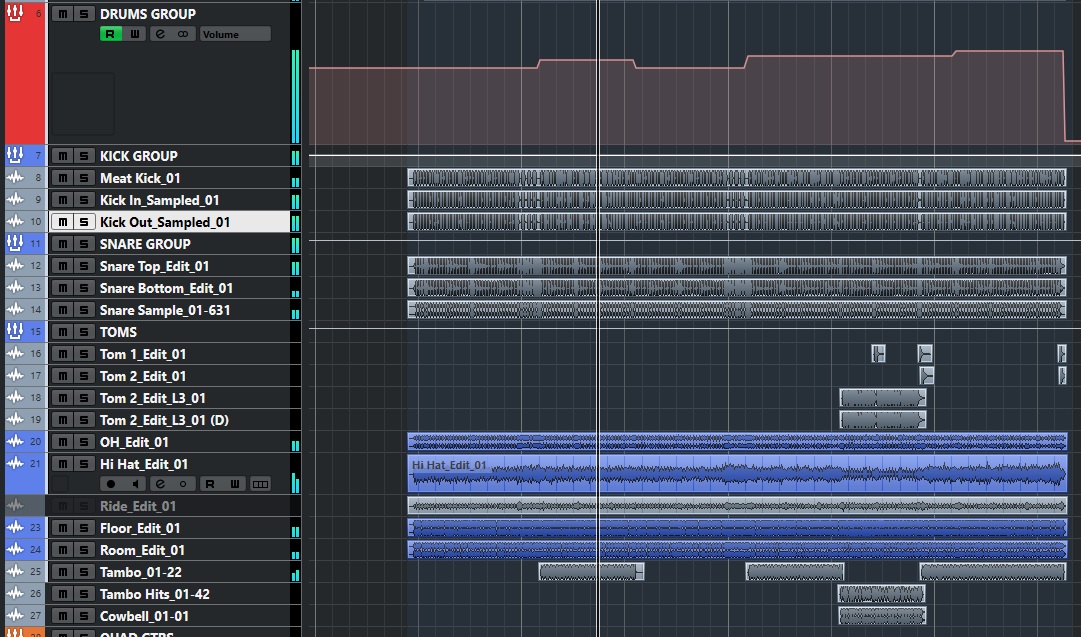
As usual, I like to divide my drums up into sub-groups, and then route all those, along with any leftover tracks, through a main drum group. Then I can process the kit as a whole and easily automate the overall drums volume. The drums for this song were recorded fairly well, so I didn’t have to do any heavy processing to fix things. In fact, the kick drums tracks were marked as “sampled”, so there was no bleed on them at all. Out of the 3 snare tracks, the two live ones were already “edited” and the third track was a sampled snare that already had a nice stereo reverb on it. All of that made my work even easier.
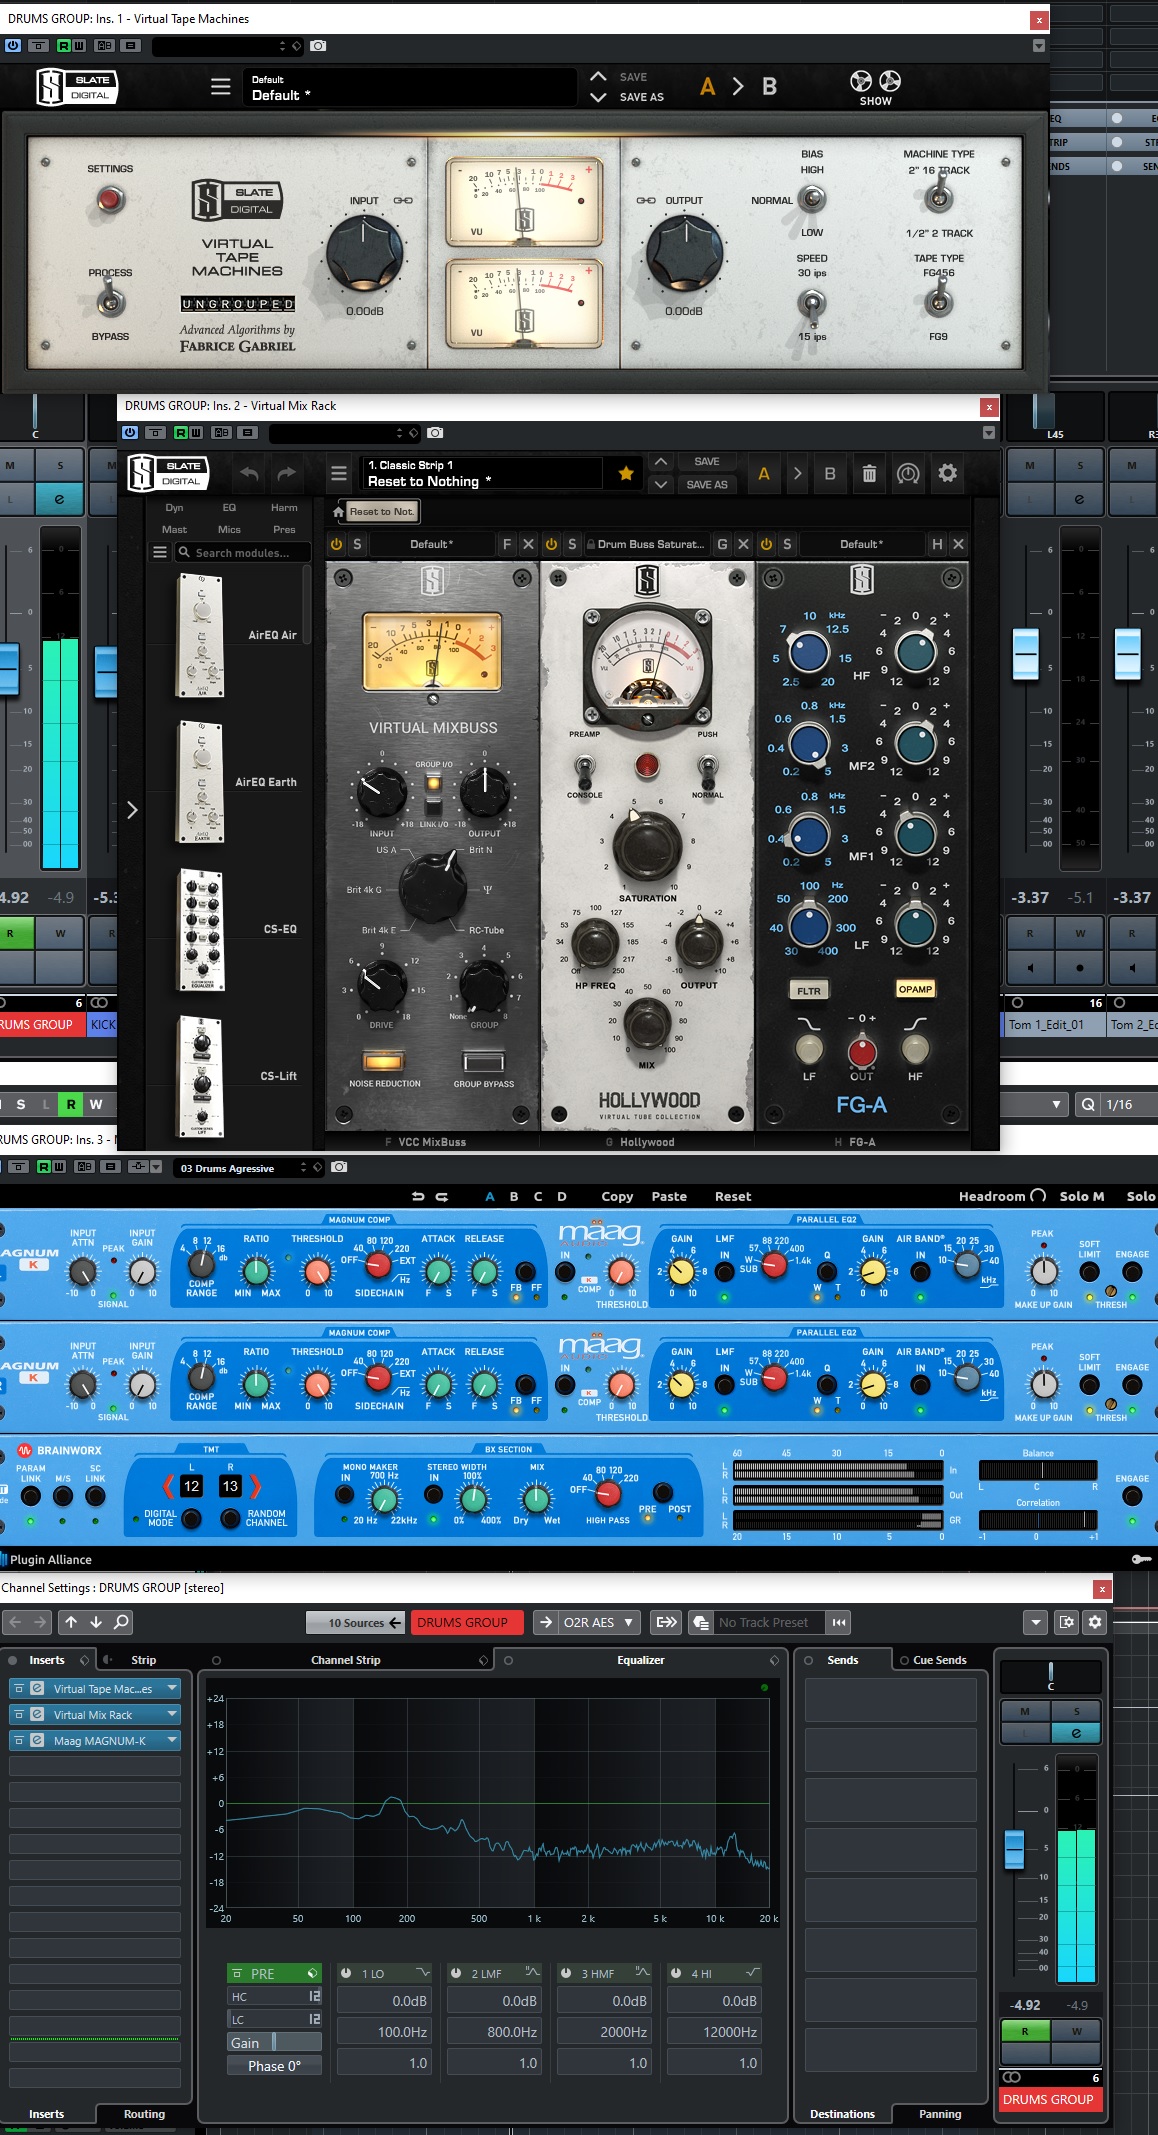
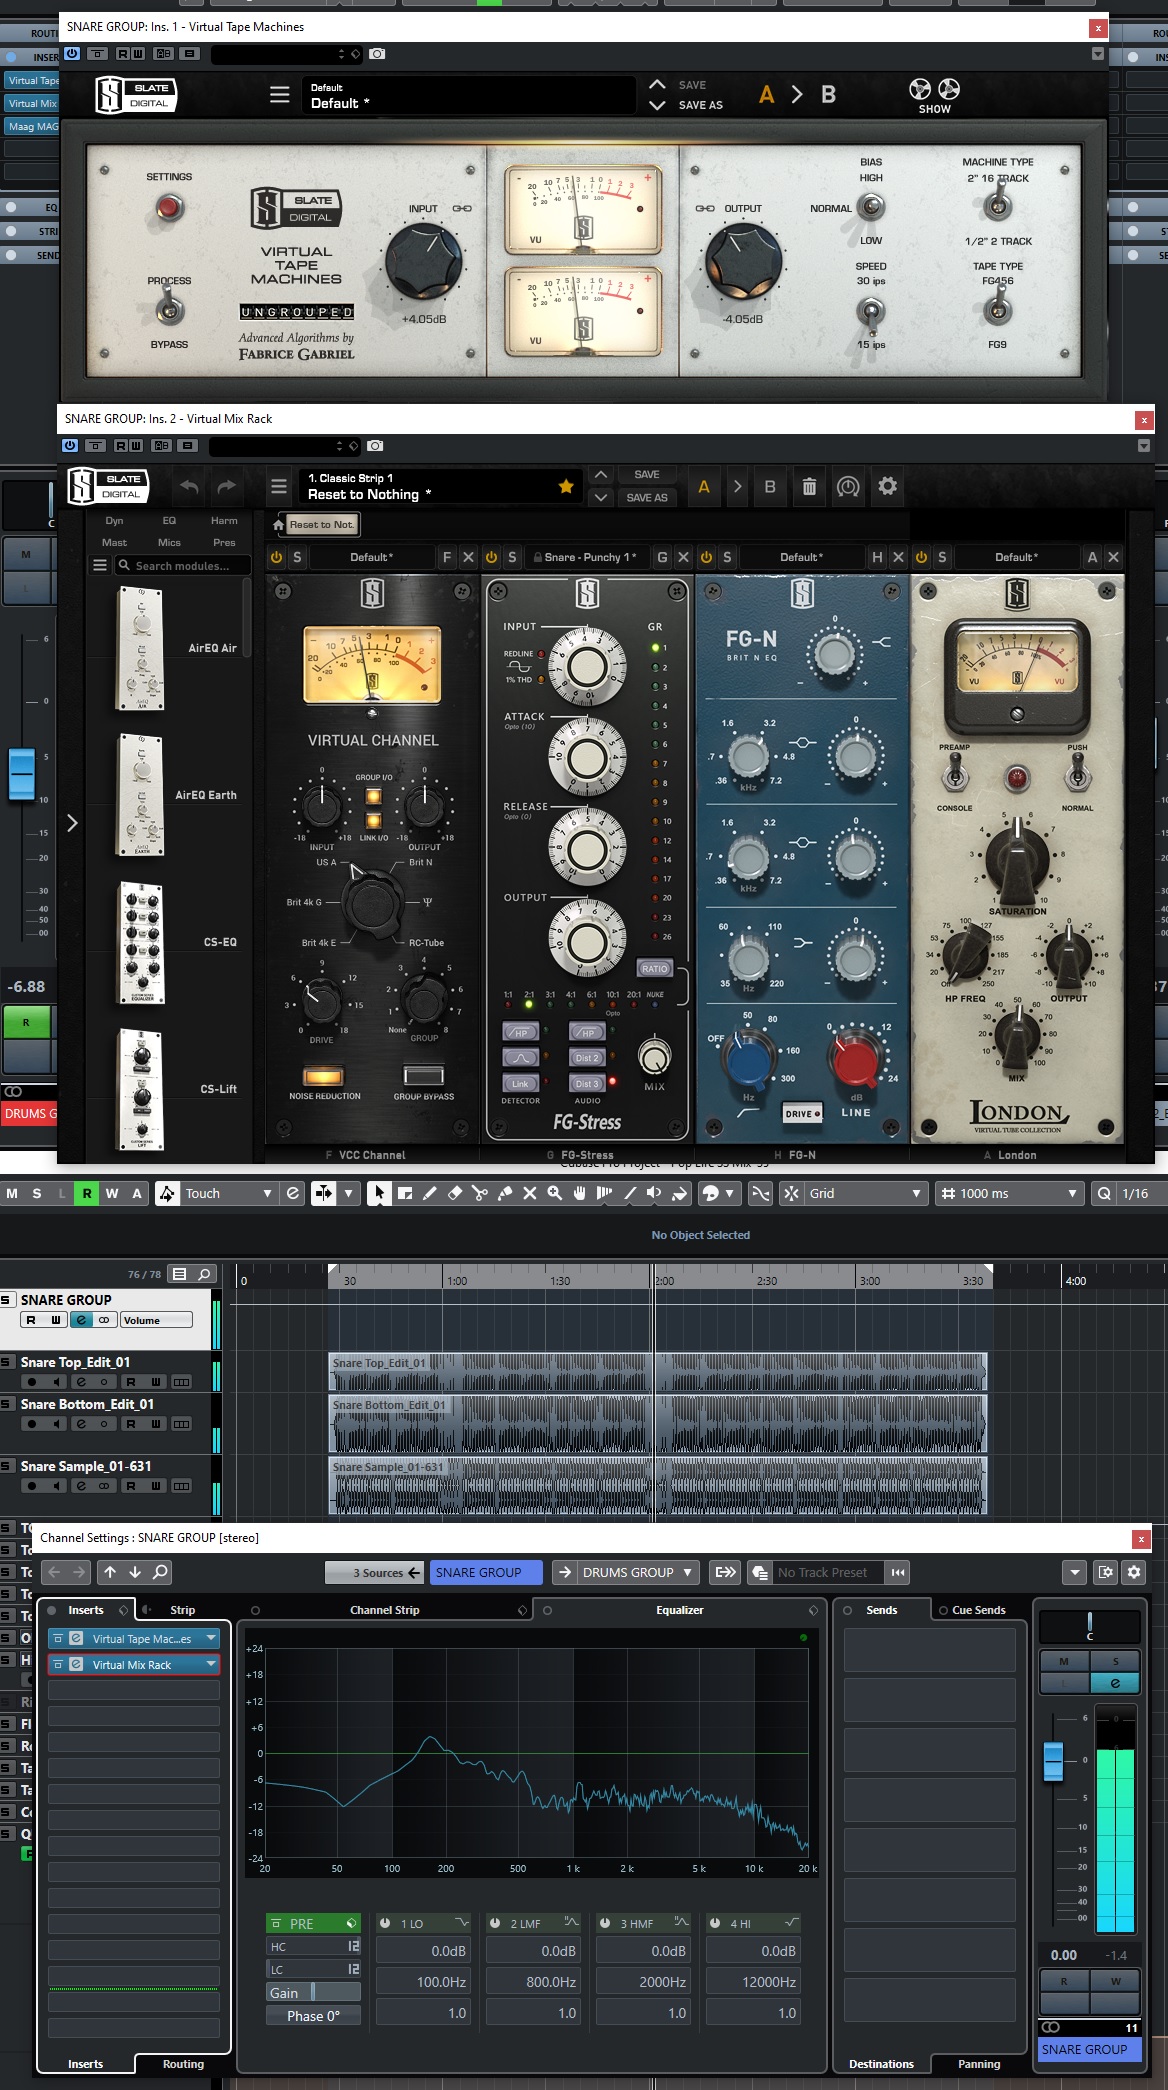
For the overall drum group/buss processing, I had the Slate Virtual Tape Machine first to add a bit of that tape sound, followed by a Slate Virtual Mix Rack that had the Virtual Channel in the first slot, a tube emulation in the second, and a bit of API modeled EQ in the third. Nothing extreme at all. That was all followed by the Brainworx Maag Magnum-K compressor/EQ, blended in at about 50% just for a tiny bit of overall compression and a bit of overall brightening with their parallel EQ. That whole combination of processing really helped to beef up the drums and get them to cut a bit more in the dense sections of the mix.
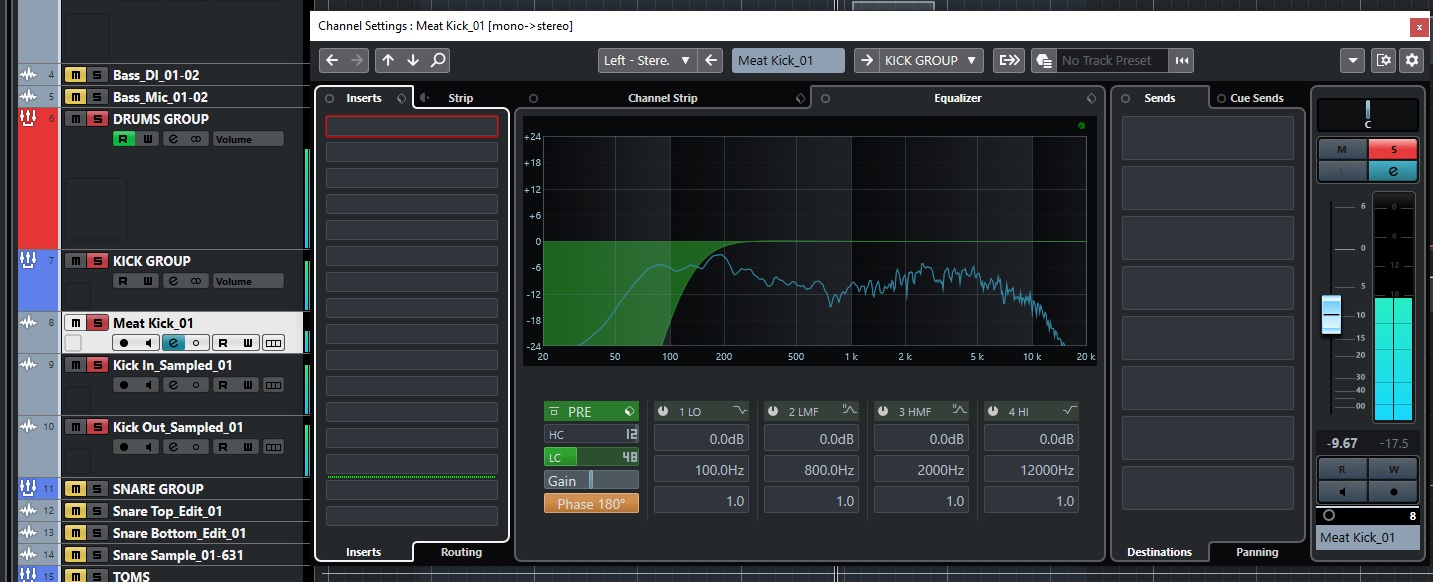
KICK DRUM
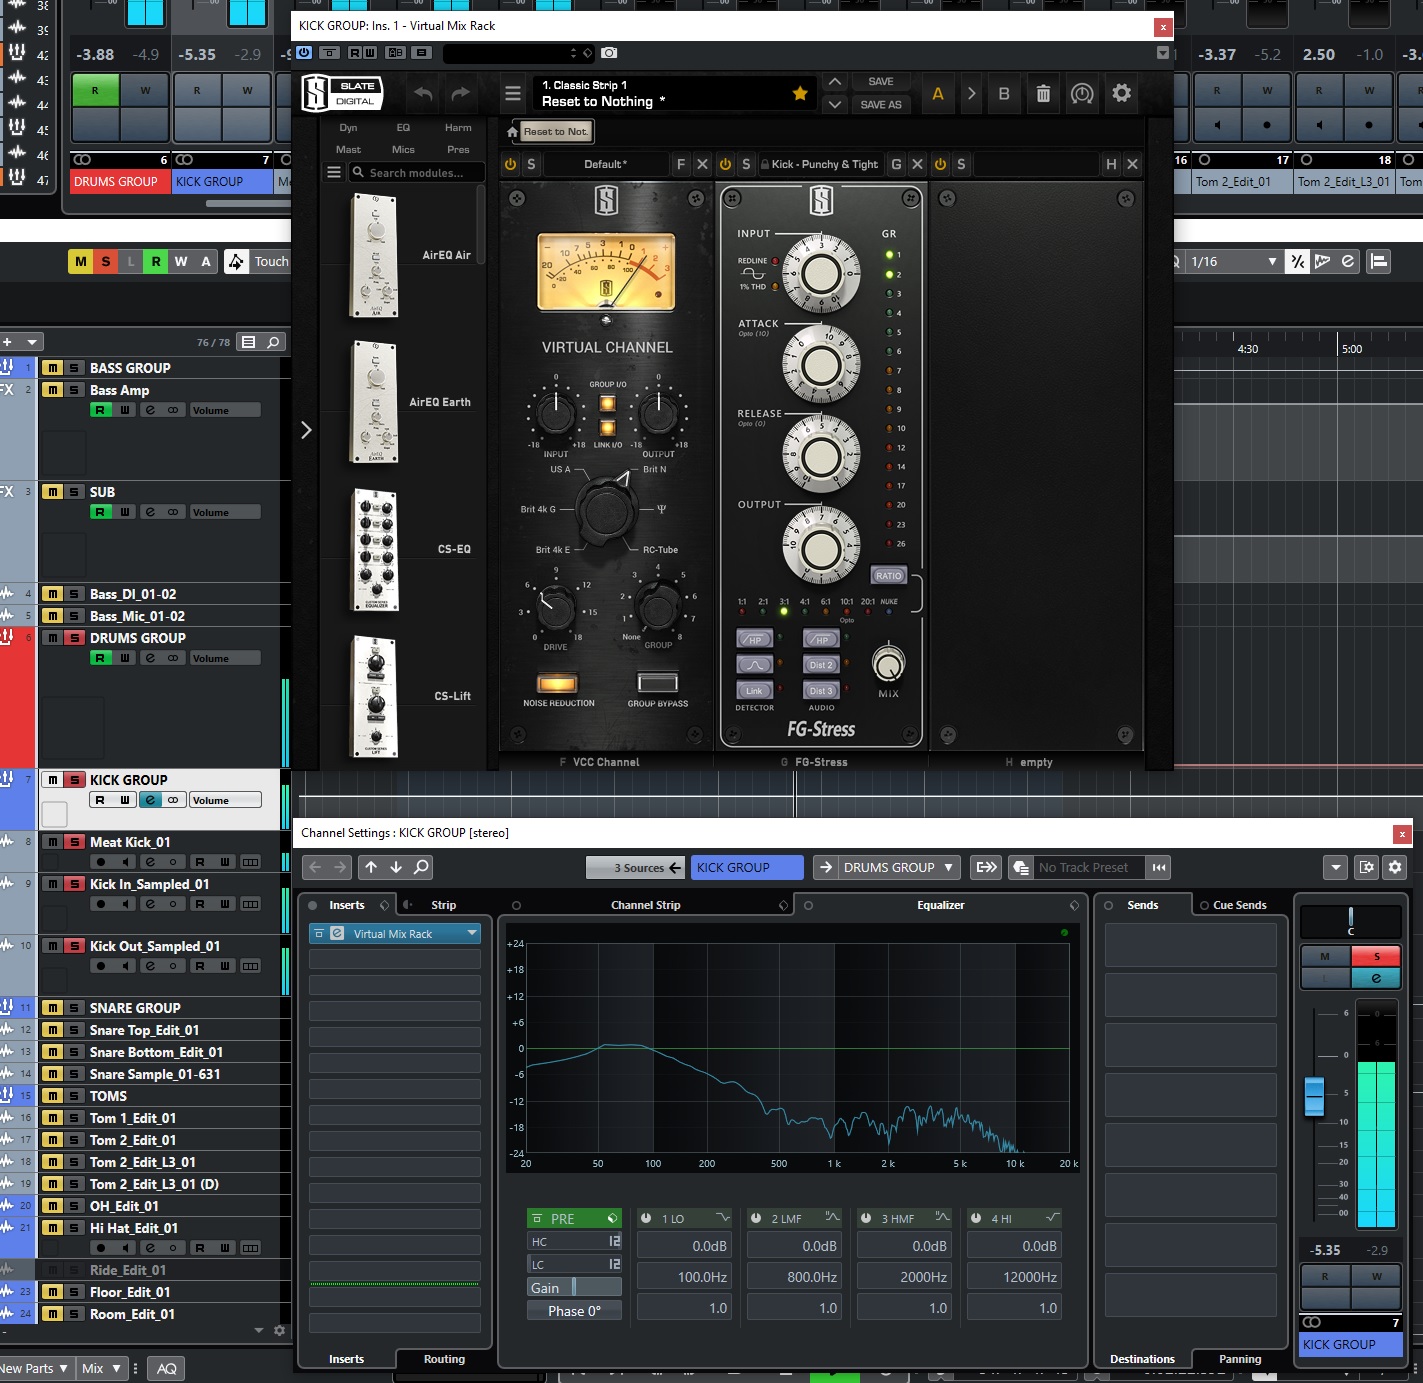
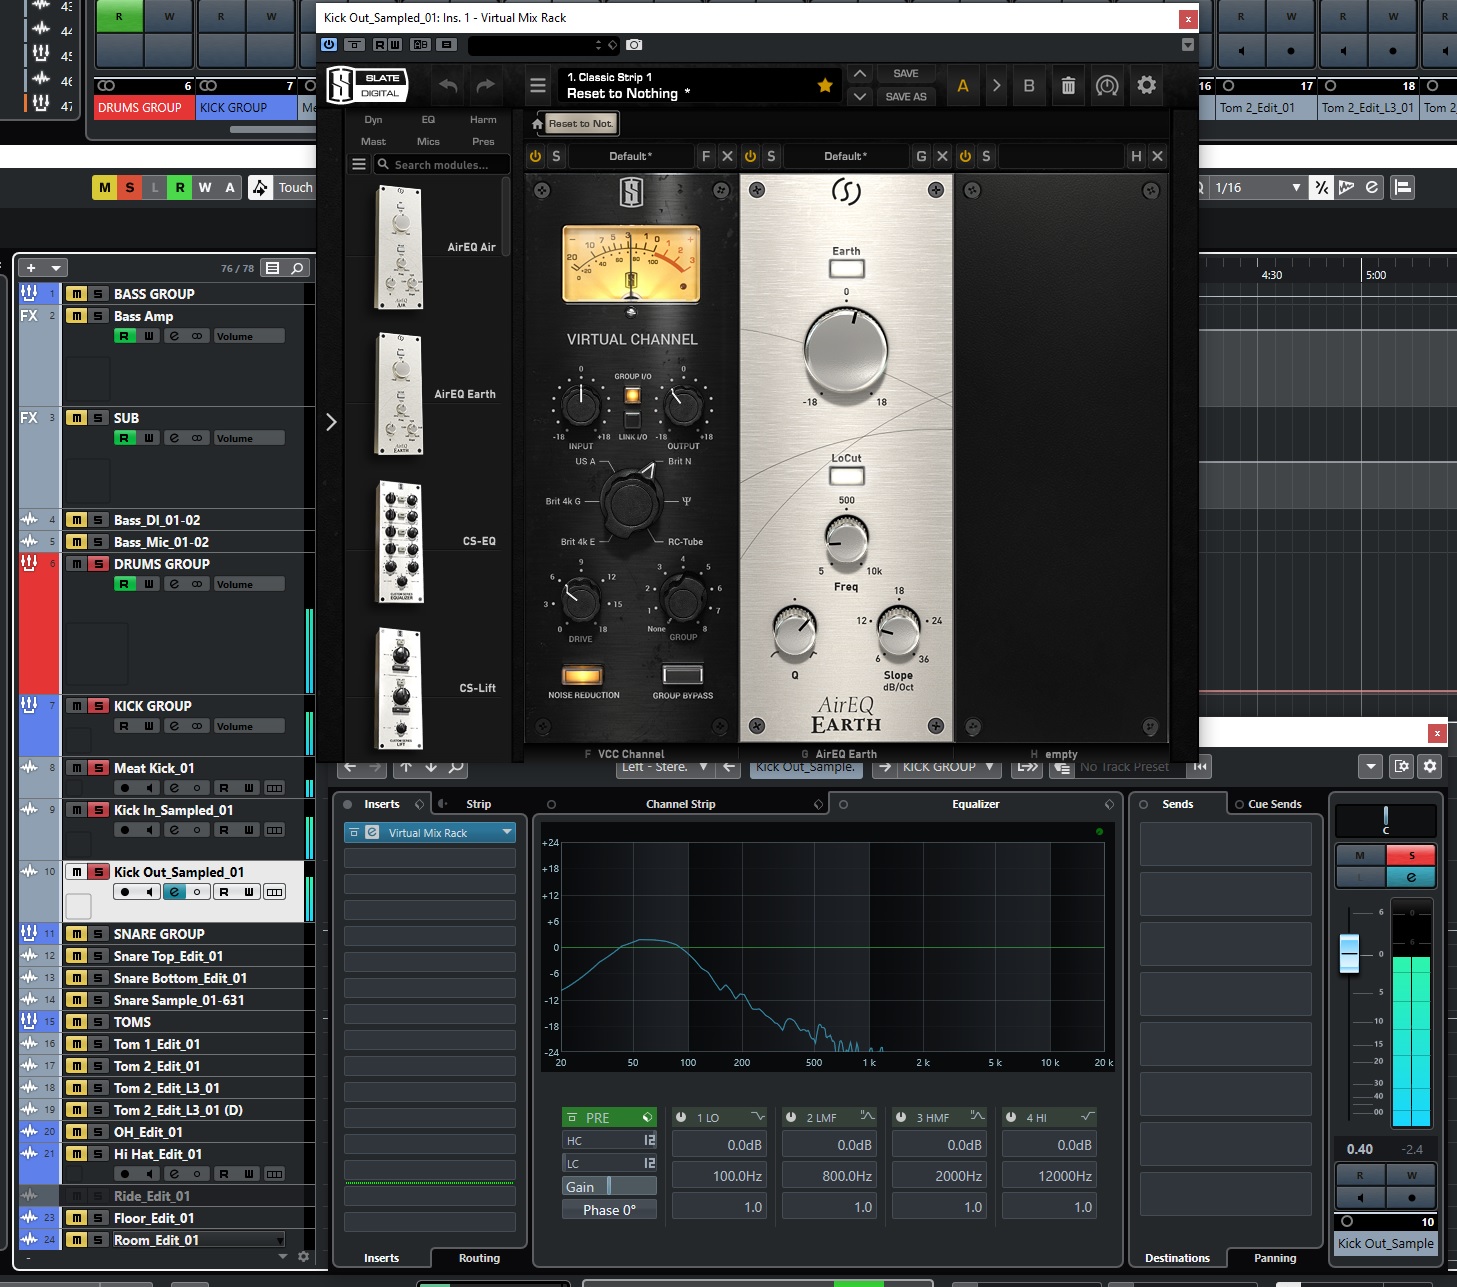
For the Kick drum, I was given three tracks: “Meat Kick”, “Kick In Sampled”, and “Kick Out Sampled”. I ended up using the Meat Kick pretty much only for the clicky attack sound, and filtered out all the low frequencies on that track, and kept the volume of it fairly low compared to the other two traks. Kick In was used as kind of the overall kick sound, and I boosted the attack frequencies for it with the channel EQ, and also increased the attack and reduced the sustain with the SPL Transient Designer Pro, but with that blended it at a bit over 50%. The main low end thump I got from the Kick Out Sampled track, and I enhanced that thump using my favorite new resonant high pass filter with the Air EQ Earth plugin on the Slate Virtual Mix Rack. All three of those tracks are routed to the Kick Group channel, which has some Slate Virtual Channel emulation followed by the Slate FG-Stress compressor.
SNARE DRUM
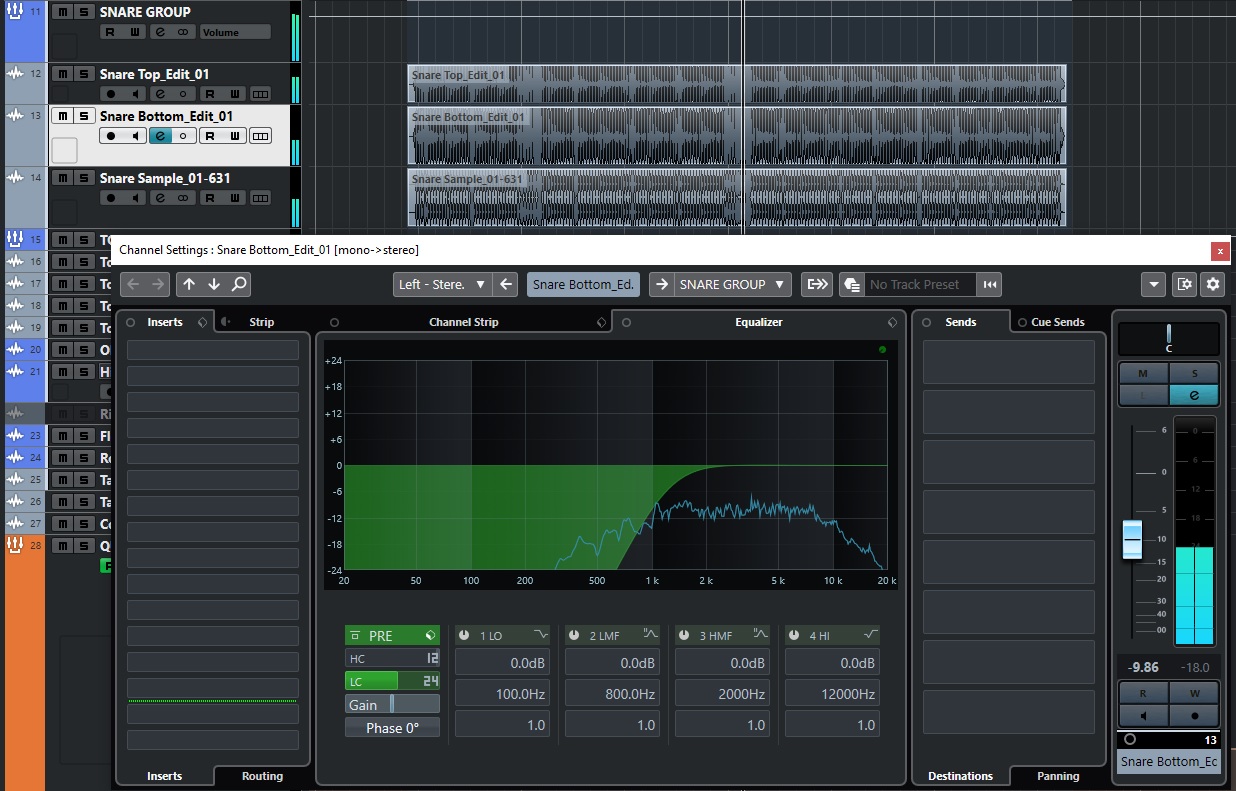
For the Snare Drum, I was also given 3 tracks: “Snare Top Edit”, “Snare Bottom Edit”, and “Snare Sample”. The only thing I did on an individual track was to filter out all the low end on the Snare Bottom channel, as I only used that for the buzzy snares part of the sound. The Snare Sample sound was mostly attack, without much low end body, but it had nice stereo reverb, so I blended that in lower in the mix mostly for that reverb. All three were routed to the Snare Group where I did the overall processing. Nothing too heavy for the overall processing: A bit of tape emulation, followed by some channel emulation, a bit of Distressor style compression, some very minimal Neve style EQ, and a bit of tube emulation blended in at 50%.
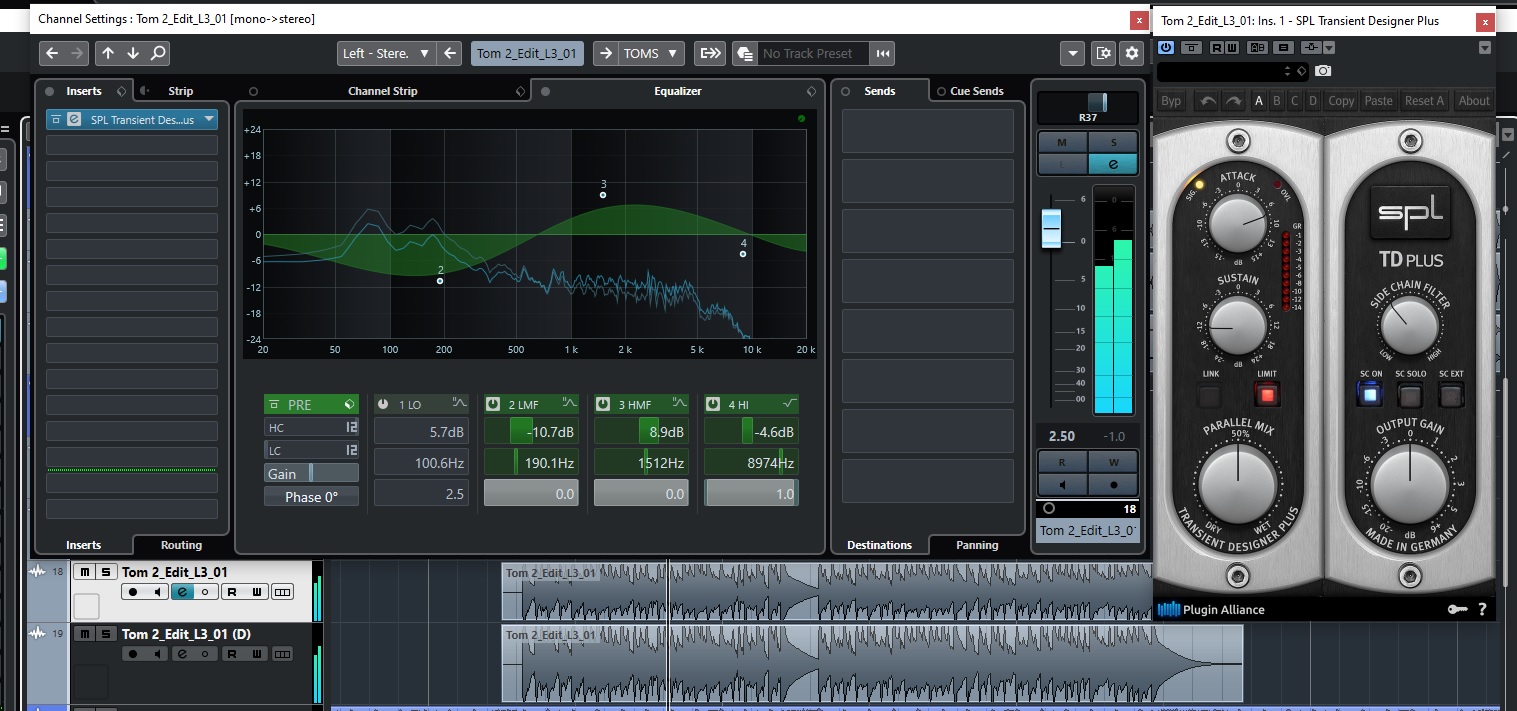
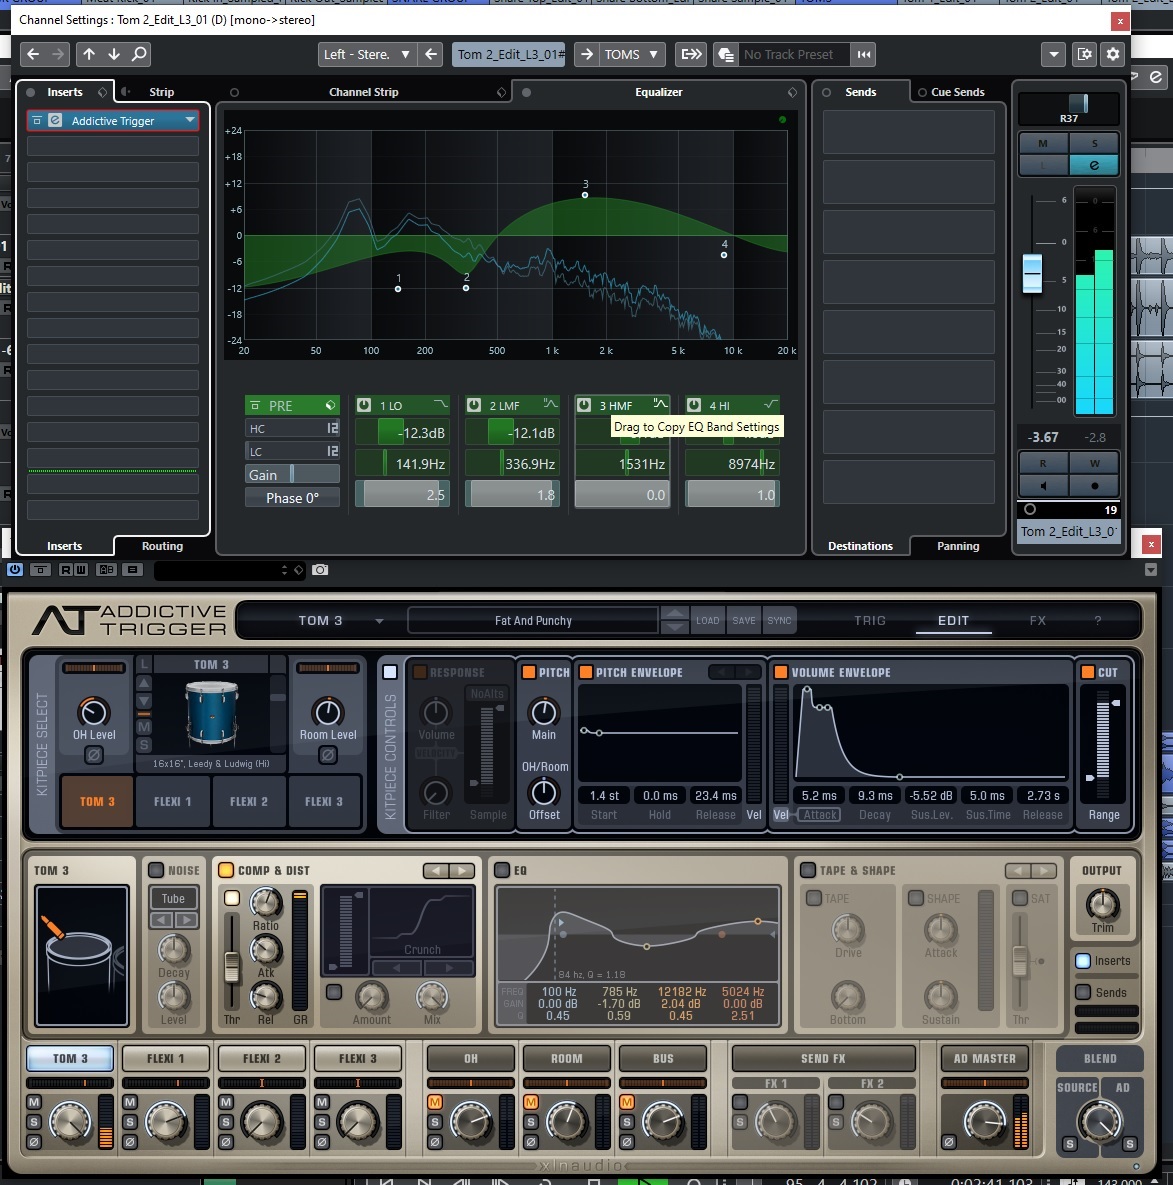
TOMS
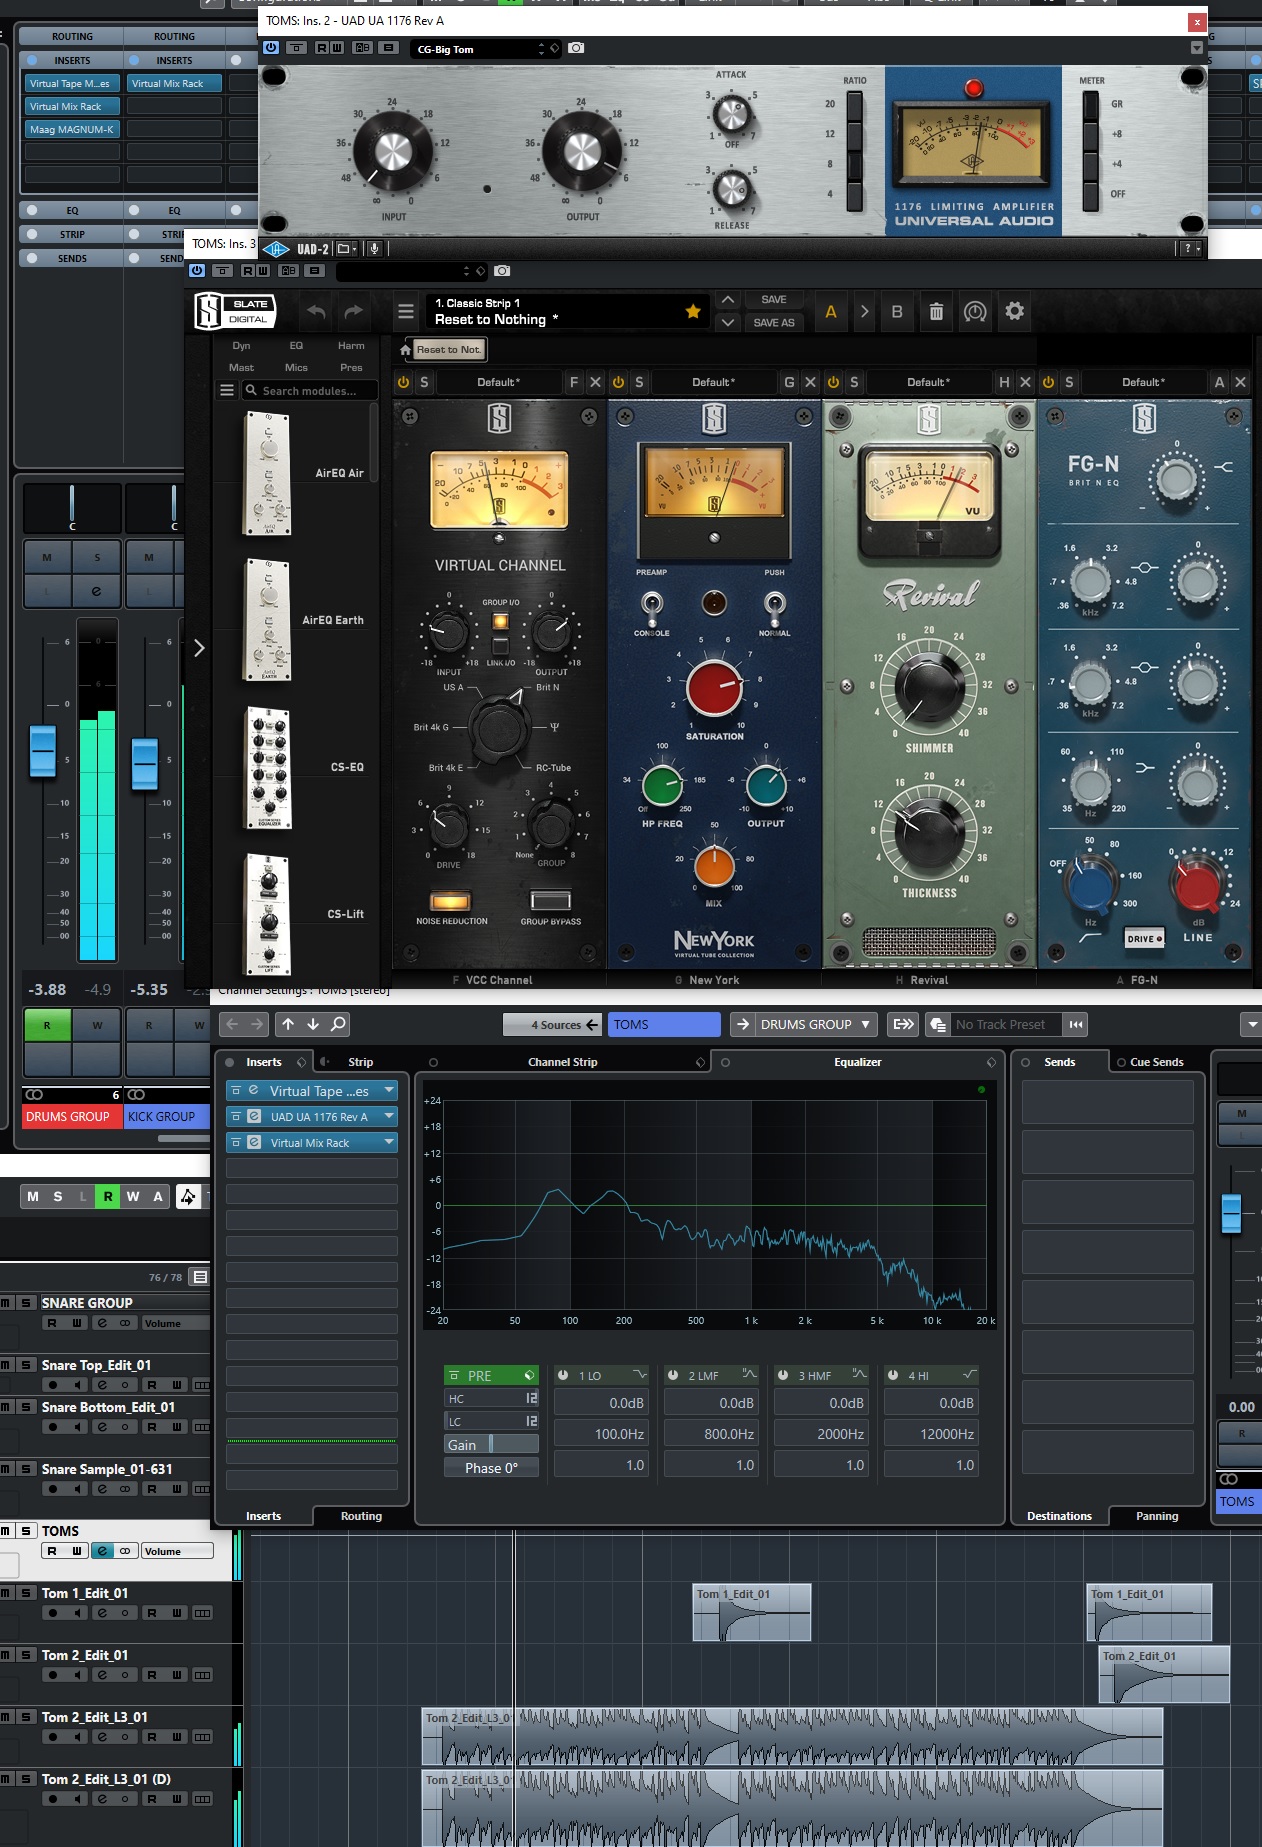
Even though the Toms were only played during the bridge and at the very end, they were the hardest part of the kit to get to sound right. The individual Tom1 and Tom2 tracks were fine and didn’t need any individual processing. However, the floor tom pattern (although labeled as another Tom2 track) was a bit tricky to get right. I couldn’t get the attack and tone I needed to cut through using that section of the track all by itself no matter how much I played with the EQ and other processing. So, I ended up duplicating the track and using the second one to trigger a floor tom sample, spending a lot of time trying to find a sample that blended in well with the original but gave me the extra bit of attack and tone I needed to cut through without overpowering all the other instruments in that very busy section of the mix. All the other processing was done on the Toms group channel, which had tape emulation, followed by some 1176 style compression from UAD, and then the Slate Virtual Mix Rack with channel emulation, tube emulation, and a couple different EQs to shape the tone.
OVERHEADS, ROOM, PERCUSSION
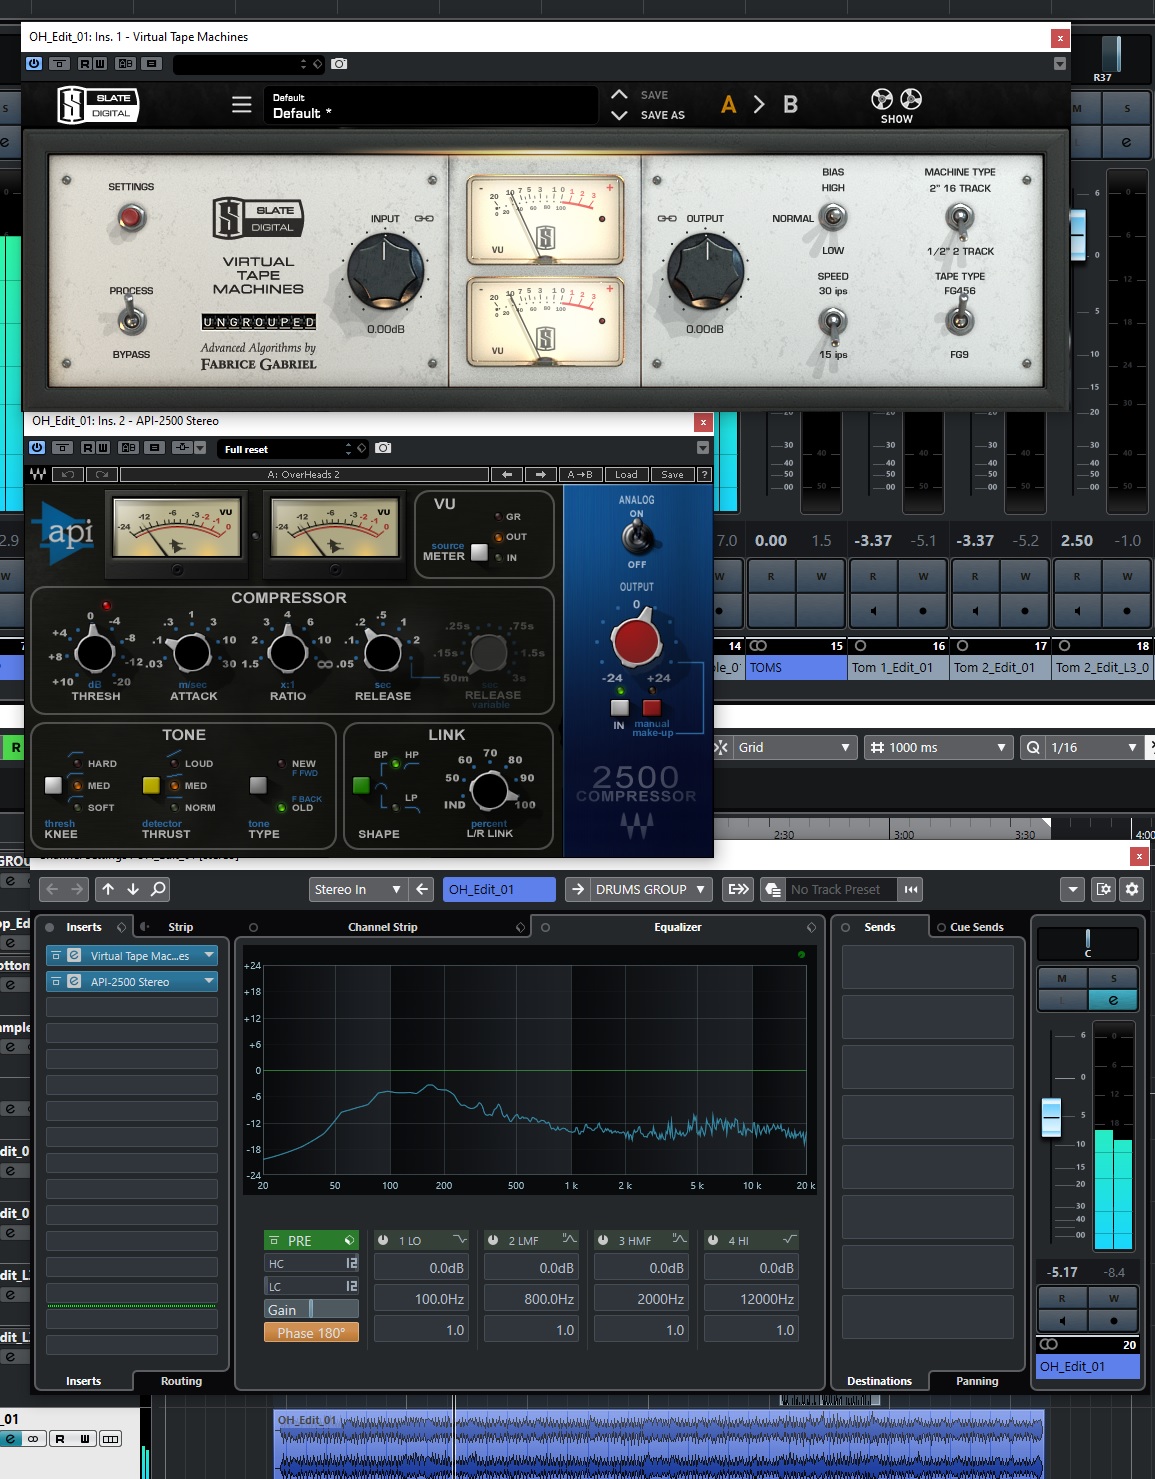
The rest of the drum channels didn’t need much work at all, other than small amounts of channel EQ, and they were all routed through the main drum group (including the tambourine and cowbell tracks). The only individual processing I did was on the overheads track, which only had the Virtual Tape Machine followed by the API 2500 compressor emulation from Waves.
GUITARS
The guitars were nicely split out into multiple tracks, making it super easy for me to work with them. Since Matt wanted a more “rock” sound than the previous more “pop” mix he had, I wanted to make sure I got a really big guitar sound. Thankfully, with all the tracks that he provided, it was easy to do.
VS GUITARS
I was given 3 tracks for the VS (VERSE) Guitars, which was really just one guitar performance, with 2 different mic tracks, and a DI track. I used the two mic tracks “as is”, with no EQ or anything… panning one left and one right. The mic sounds were similar enough that it wasn’t much of a “stereo” image, and they were fairly distorted types of sounds. So, I took the DI track and put it through the S-Gear amp sim from Slate Digital, and went with a clean sound with a wider cabinet and reverb sound to it to blend in and give a bit of definition to the distorted mic tracks, and to also give it some ambience and stereo space.
RHY GUITARS
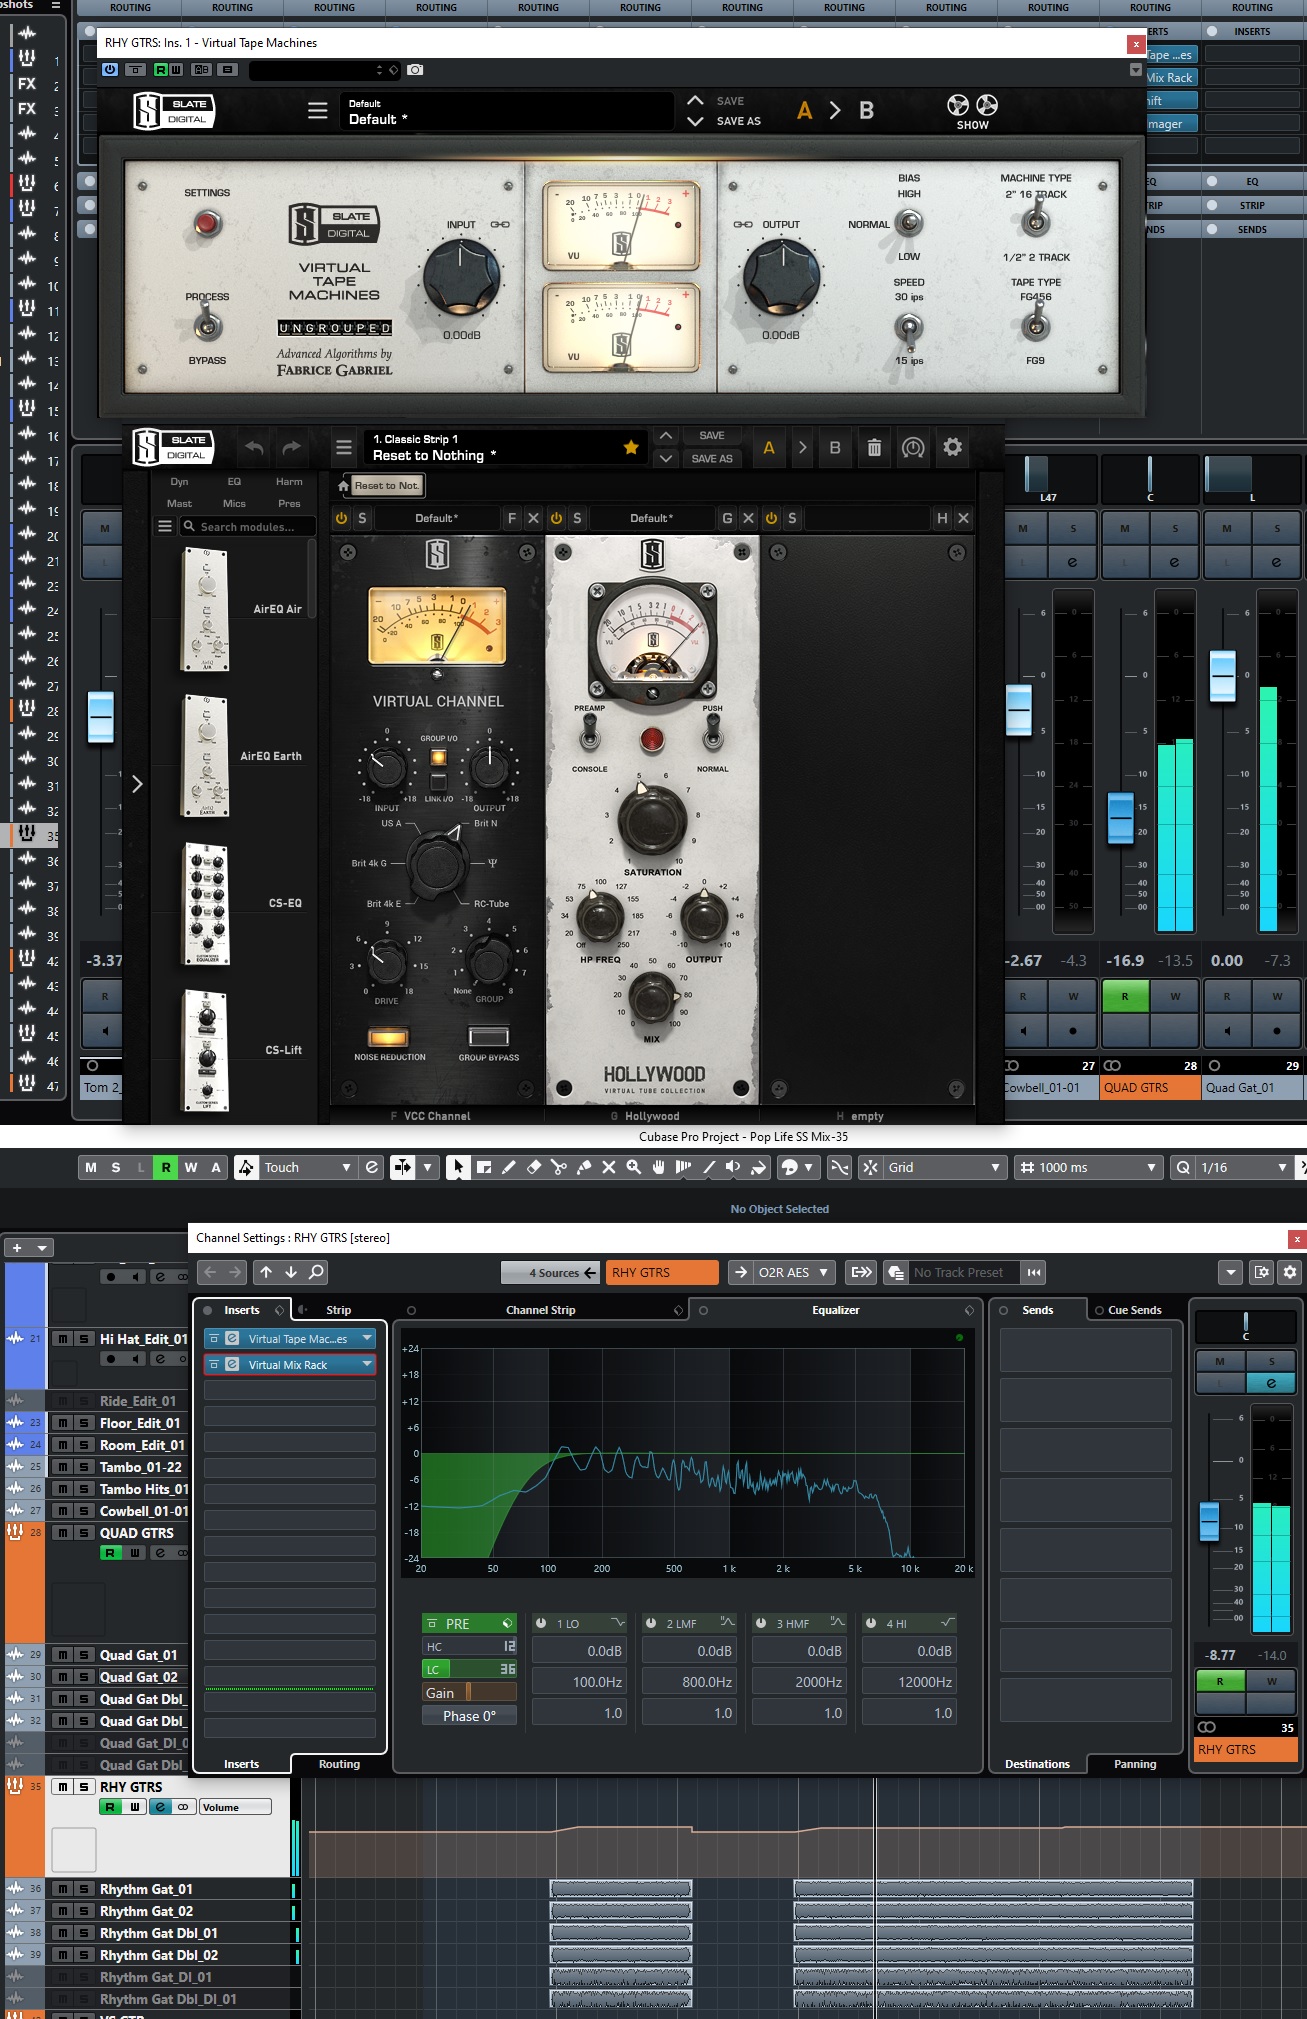
The Rhythm Guitars come in at the start of the short “pre-chorus” section, replacing the VS Guitar. These were double-tracked, so I got your typical wide sound by panning one take left and the other right. Again there were two microphones for each take, but this time I panned the 2 for each take to the same side. Although I was also given DI tracks for both takes, I didn’t need them. These tracks sounded great the way there were given to me, so there was no processing on the individual tracks. On the RHY GTRS group channel, I rolled off some of the low frequencies to keep that space in the mix for the bass and kick drum, and then put them through some tape emulation, followed by some virtual channel emulation, and a bit of virtual tube emulation to thicken them up a bit more. My idea was to use these main RHY GTRS for the beefier part of the guitar sound, so I didn’t do any type of EQ on them to brighten them up. For that small bit of time when they are on their own in the pre-chorus, they cut through just fine.
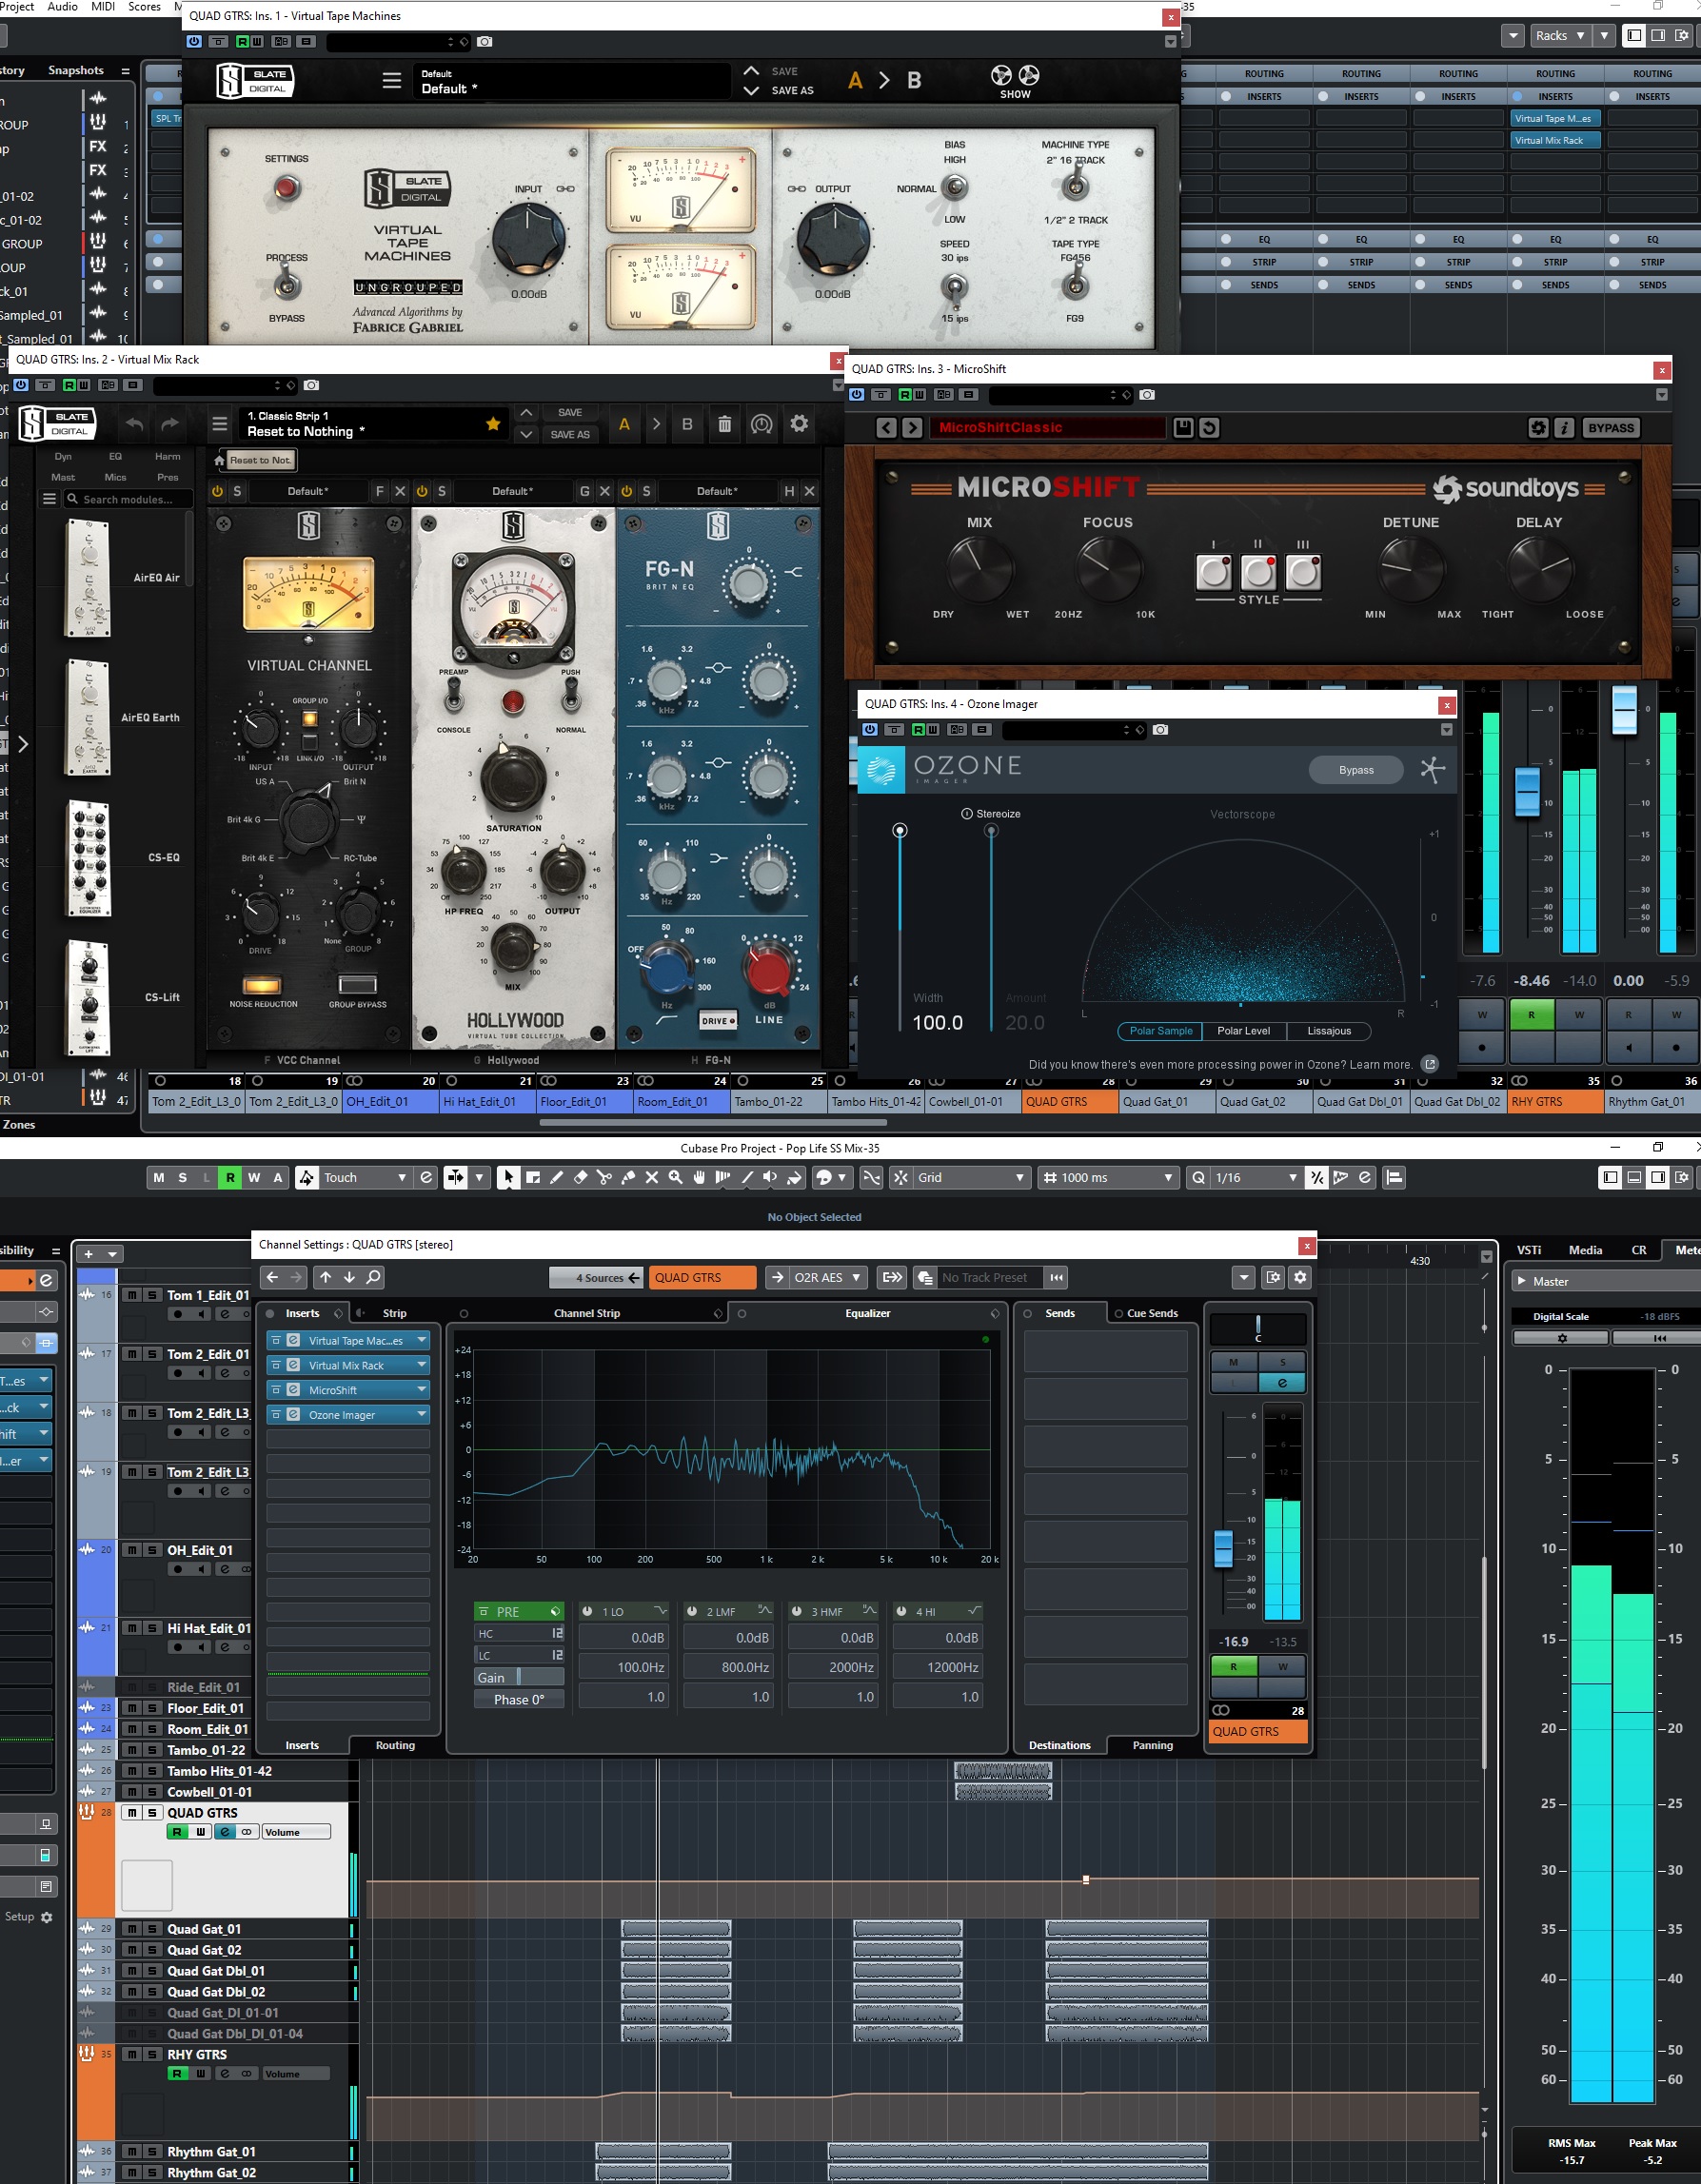
QUAD GUITARS
When the choruses kick in, they had another double-tracked set of guitars that they labelled as QUAD GTRS, since we now have 4 tracks of guitars total playing in the choruses. I wanted to add some extra contrast and punch to the choruses to give this mix a bit more of a rock feel, so I processed these much more than the Rhythm Guitars. Same setup as the RHY GTRS, and I still didn’t need the DI tracks. No individual track processing, but I had more processing on the QUAD GTRS group channel. My idea was that these extra doubled guitars should really make the mix feel a lot “bigger”. So, the main idea behind the processing was to make these a bit brighter and wider than the RHY GTRS, so you really hear the contrast when they kick in. Similar processing to begin with, tape emulation, followed by channel emulation and some tube emulation, but then a bit of EQ at the end of the Virtual Mix Rack insert to make these a bit brighter, using a bit of high shelf and adding some upper mids, while pulling out some lower mids. Then, I followed all that by two “widening” type effects. First a bit of Microshift from SoundToys to thicken them up a bit (less than 50% blend), and then followed by the Ozone Image to really widen out the stereo image of these guitars.
LD GUITAR
Nothing to show for this one. The Lead Guitar comes is a short part that comes in at the end of each chorus, and the end of the whole song. I was given 2 tracks, which was different microphones, and they sounded great “as is”, so I didn’t do anything other than adjust the levels. No EQ or any other processing was necessary.
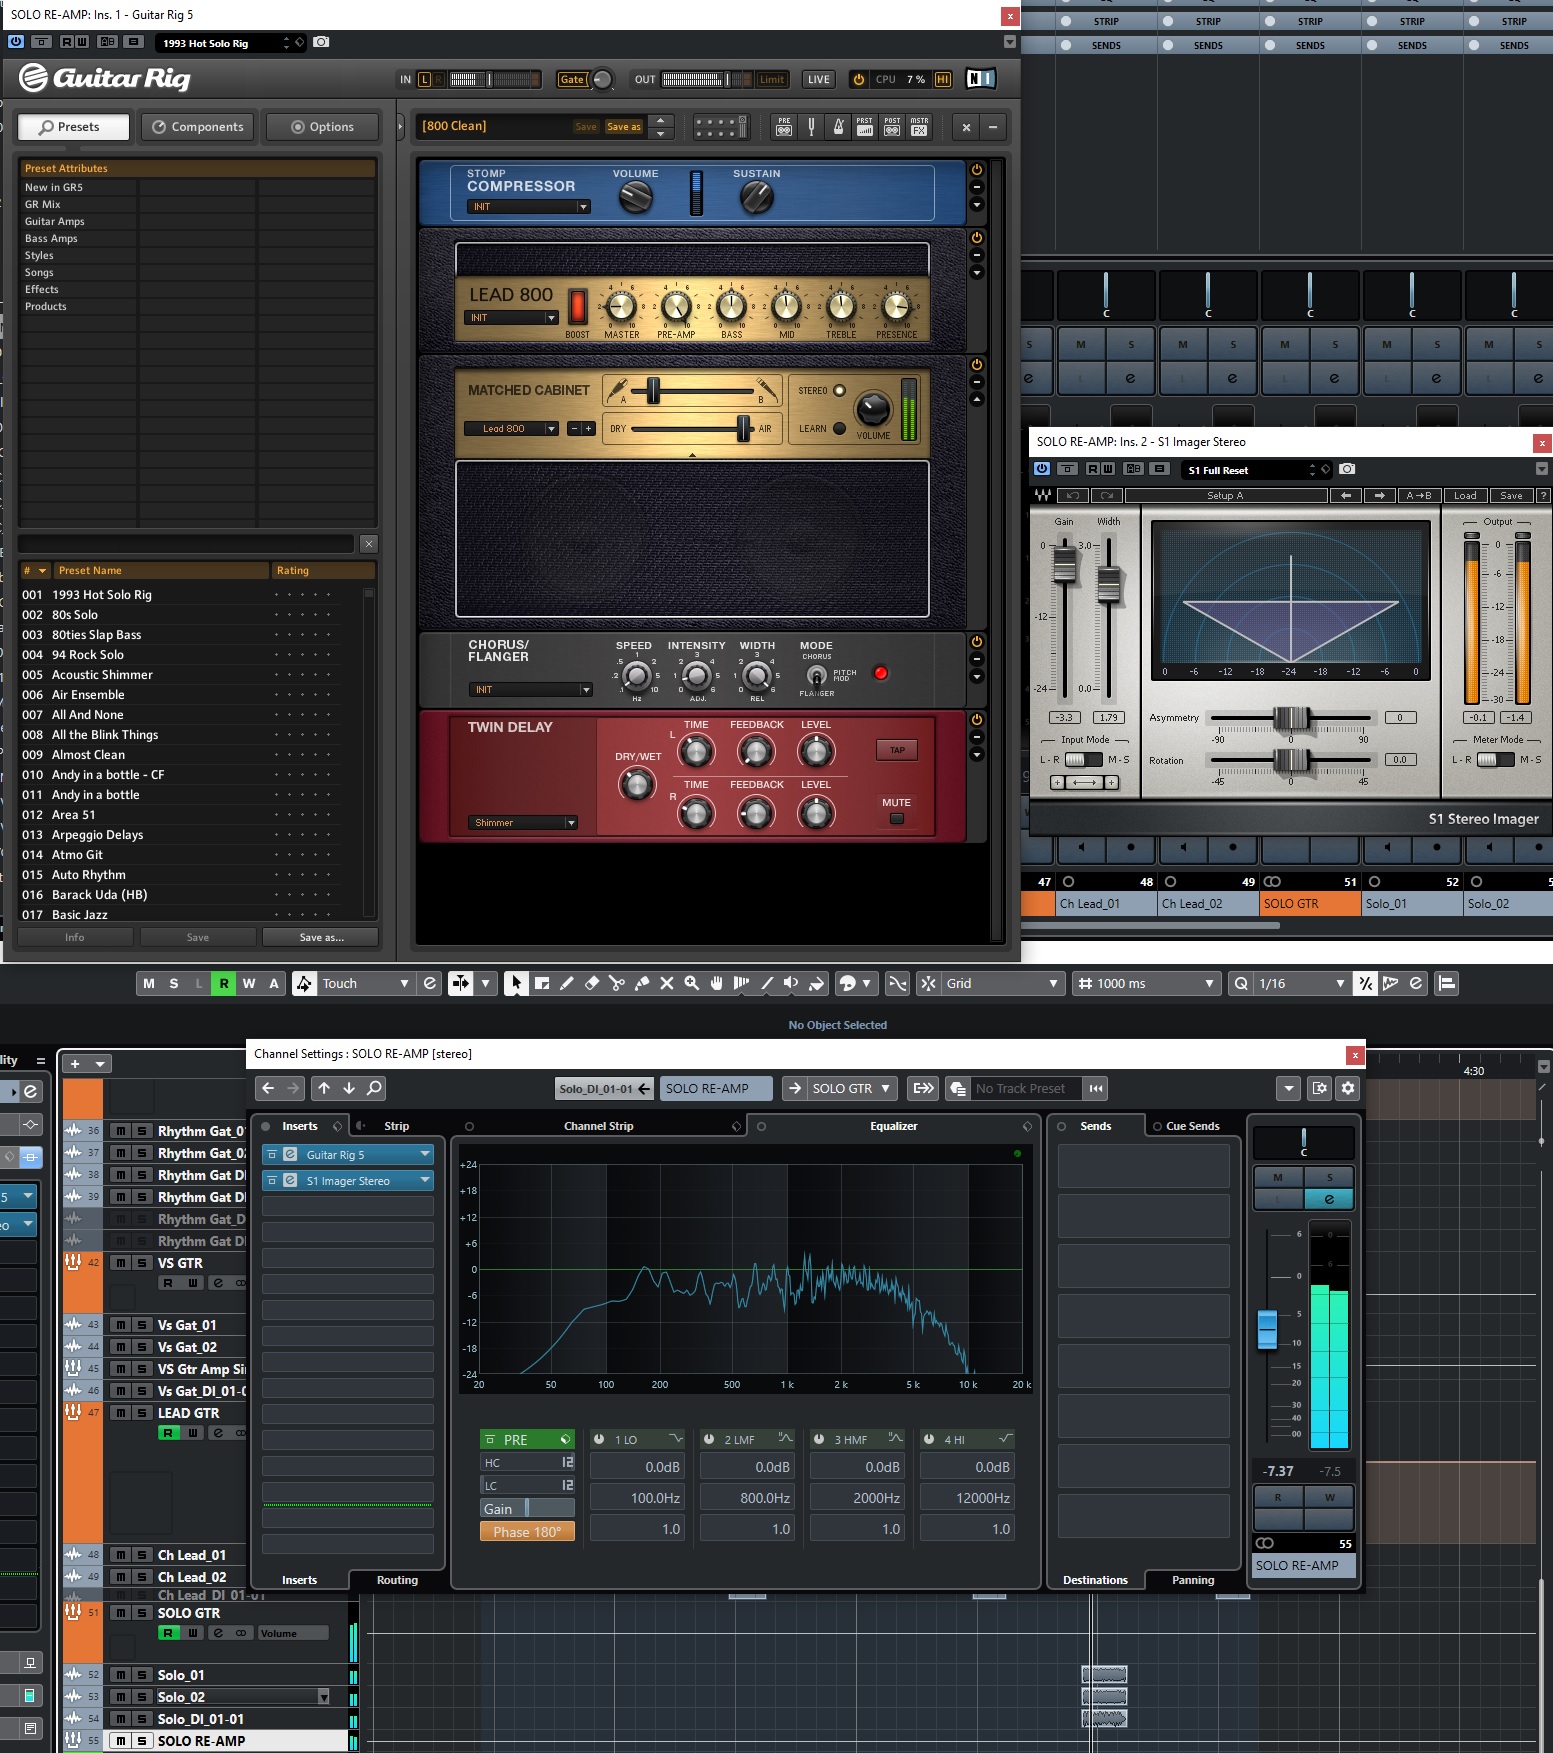
SOLO GUITAR
The Solo guitar was pretty simple as well. I was given two microphone tracks and a DI track. The microphone tracks sounded pretty good for the base guitar sound, but I wanted to widen it out a bit, so I ran the DI track through the NI Guitar Rig 5 amp sim, with a bit of a chorus/flange sound, and followed it with the Waves S1 Stereo Imager to widen that sound even more, and blended that new sound in just enough to give the solo some width and space.
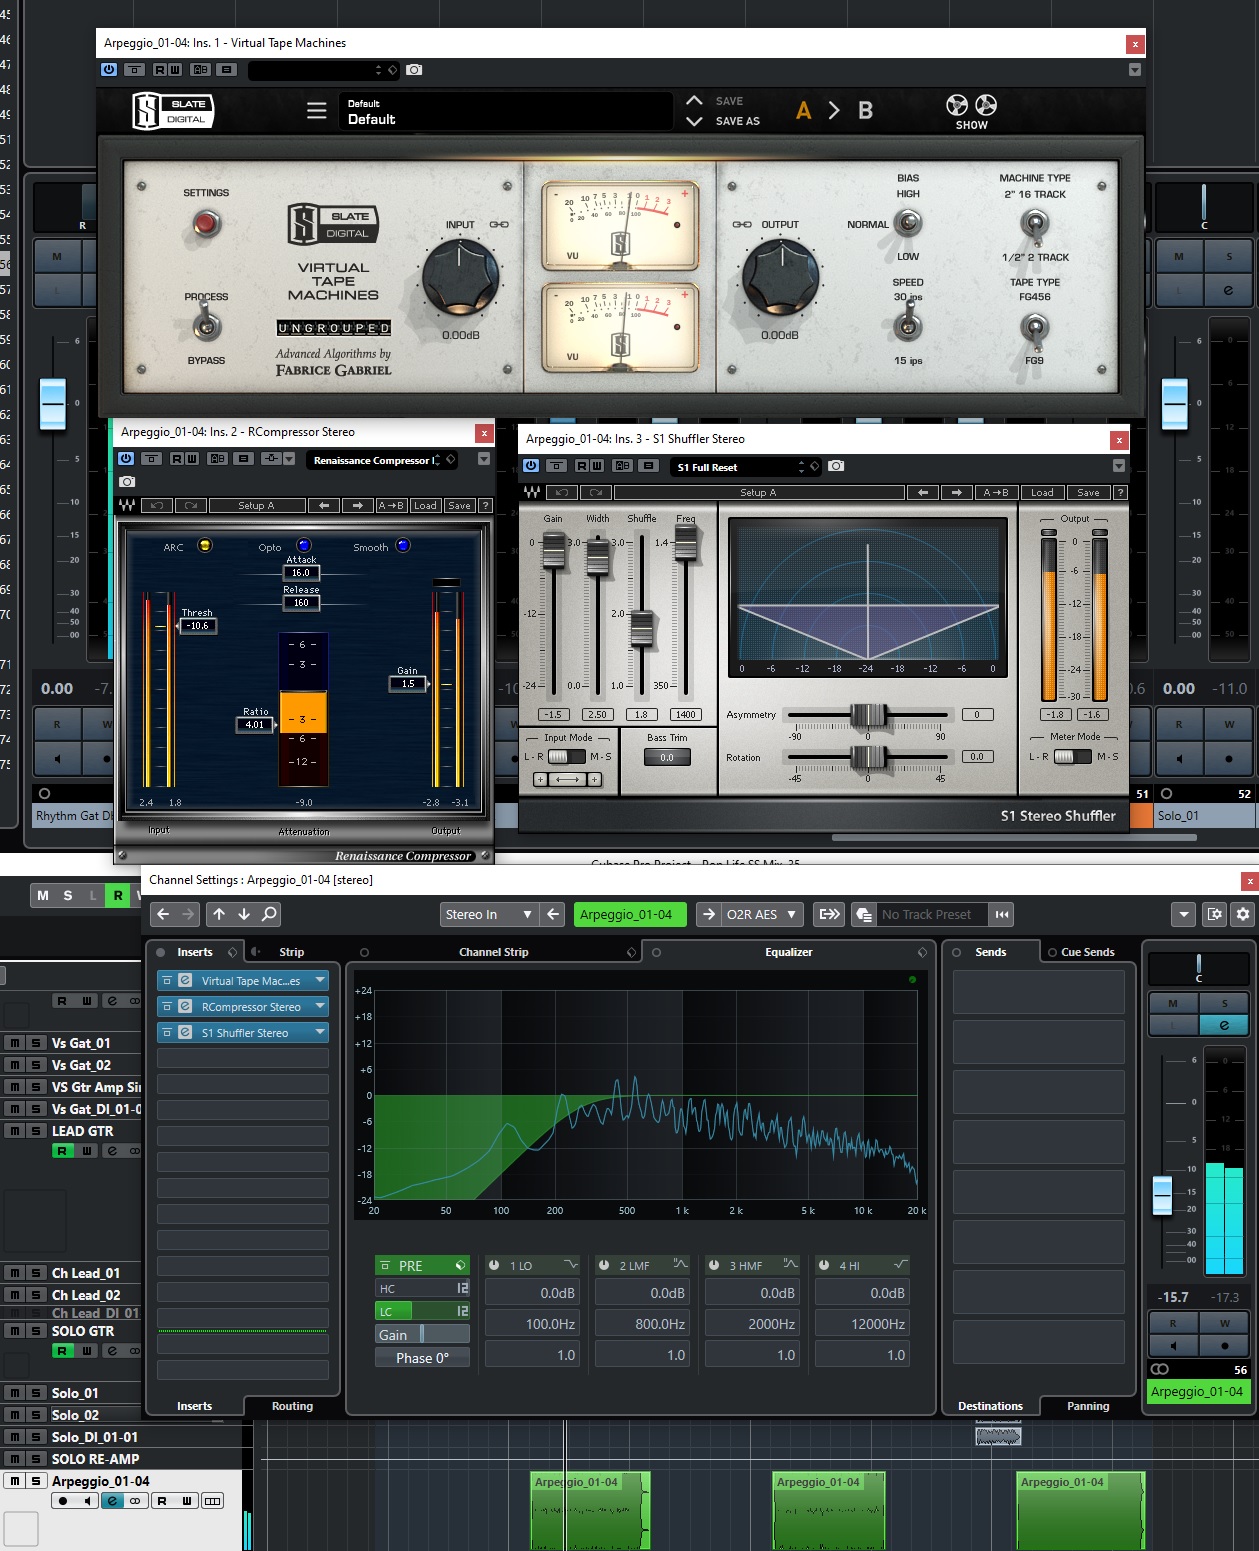
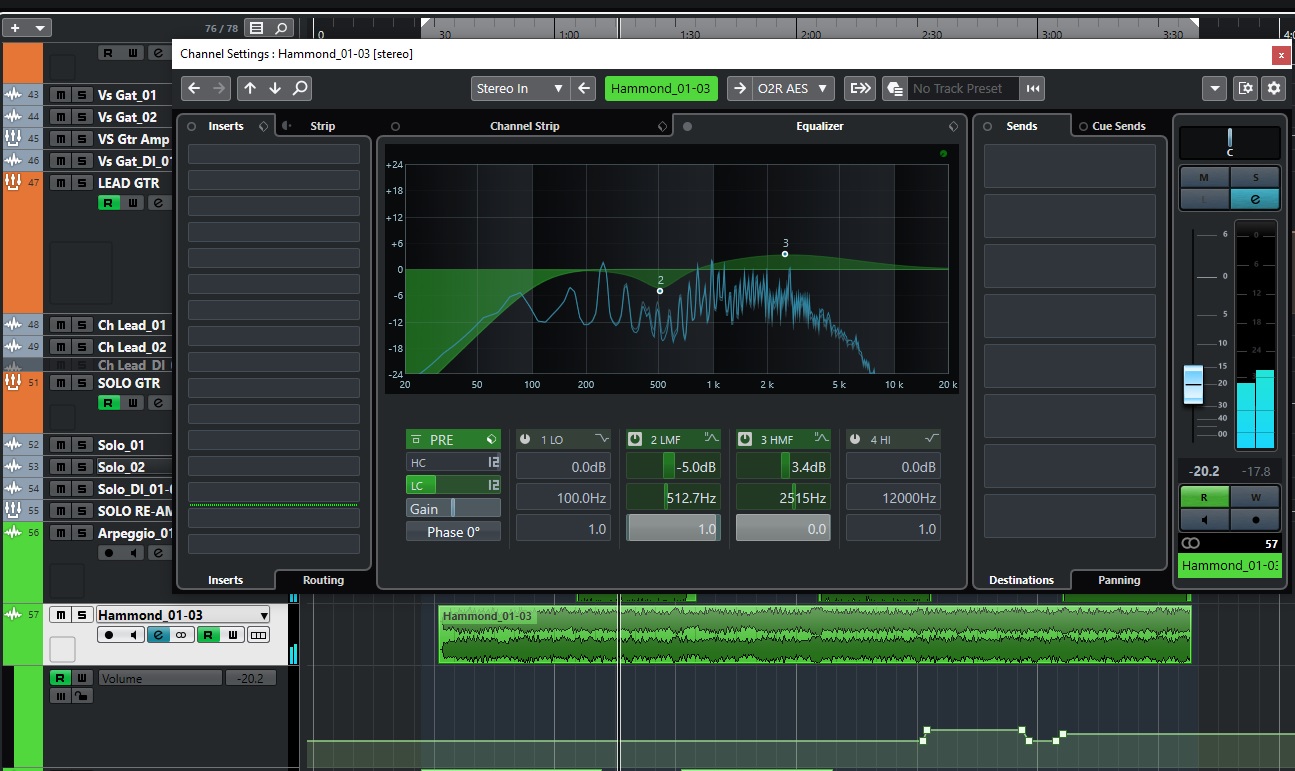
KEYBOARDS/SYNTHS
There were 4 keyboard/synth tracks. Most of them just had a bit of channel EQ (such as the Hammond), to get them to sit better in the mix and leave space for the guitars. The Arp track was the one I worked with the most. Since this was supposed to be a more “rock” sounding mix, we didn’t want the synth arpeggio to be too prominent, but it still needed to be heard among the huge wall of guitars we created in the choruses. So, for that, I put it through a bit of tape emulation, and then did some fairly heavy compression with the Waves RComp to keep the level where I wanted it, and then used the Waves S1 Shuffler to widen it and give it a bit of stereo motion, keeping it out at the edges of the stereo field.
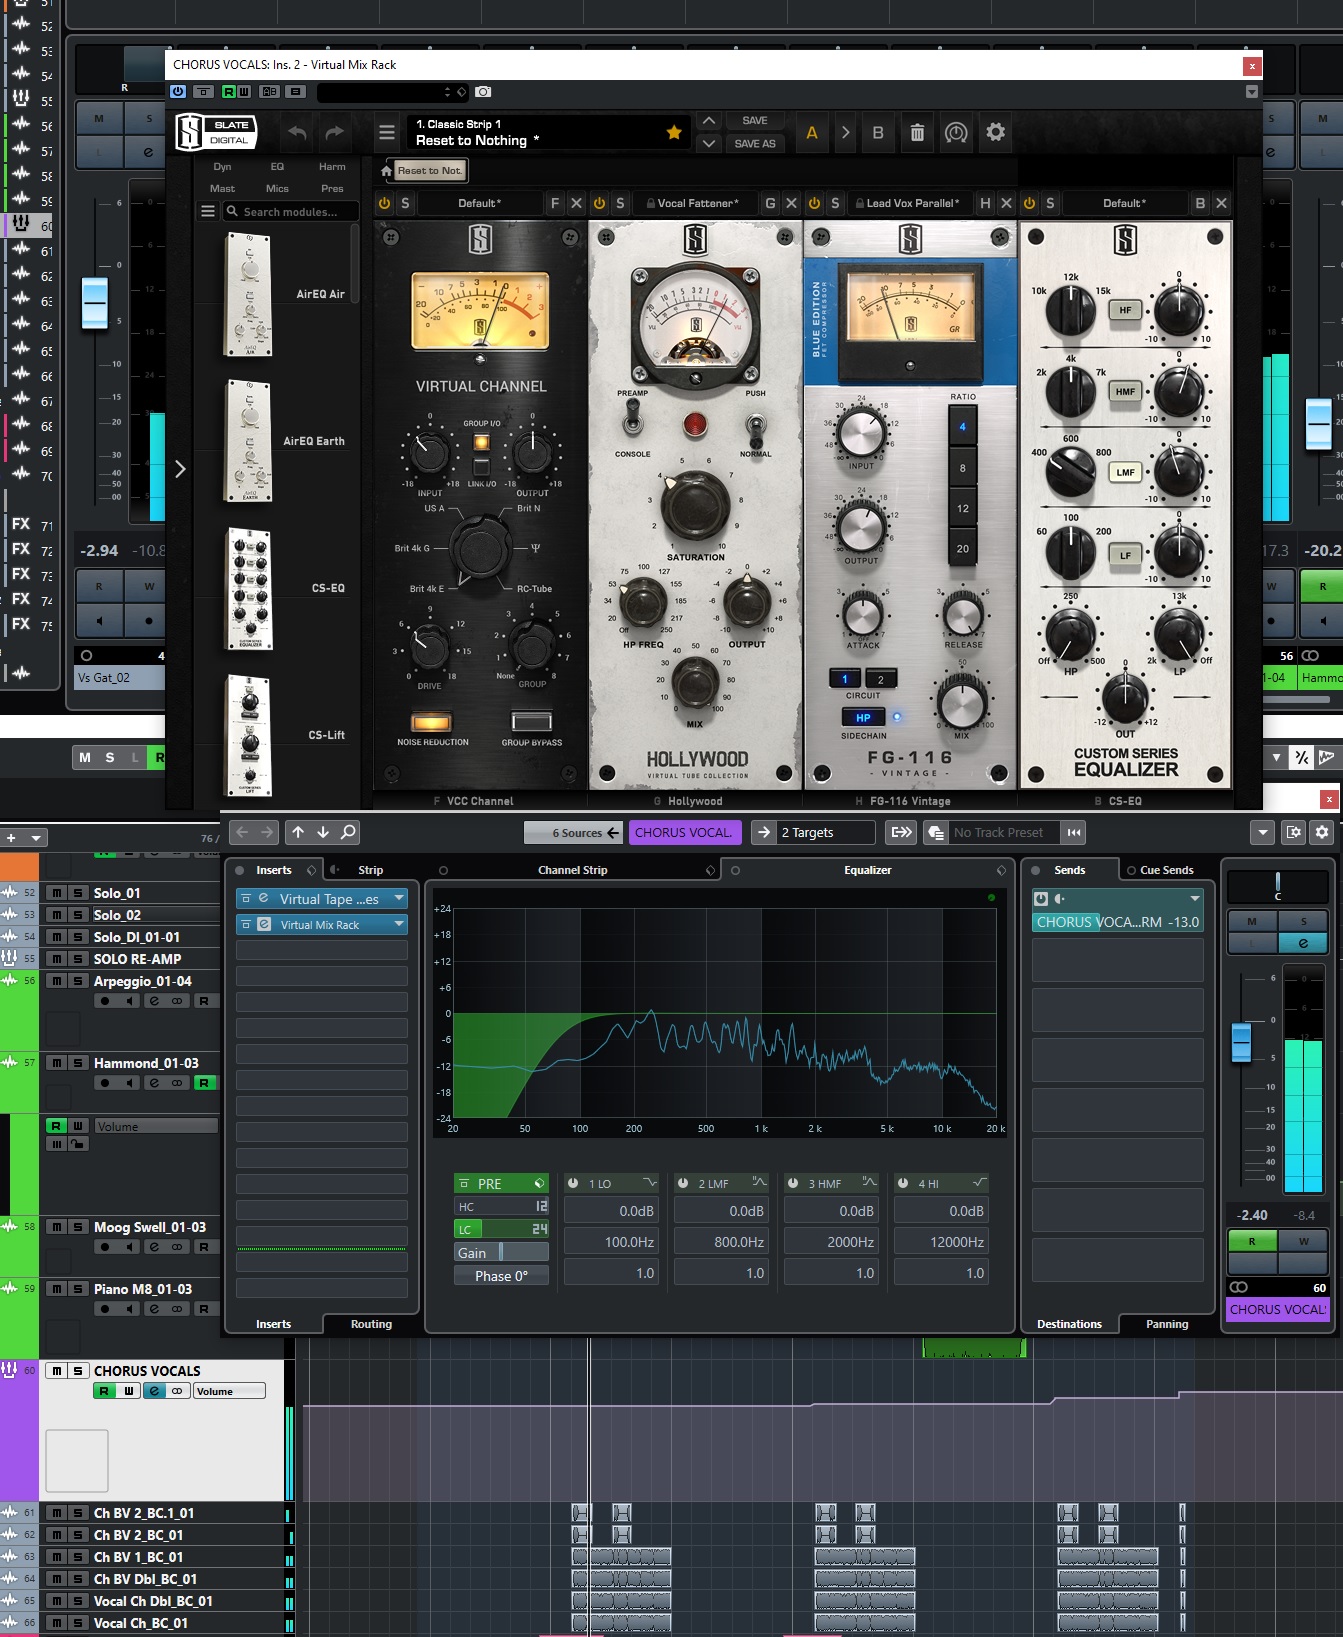
CHORUS VOCALS
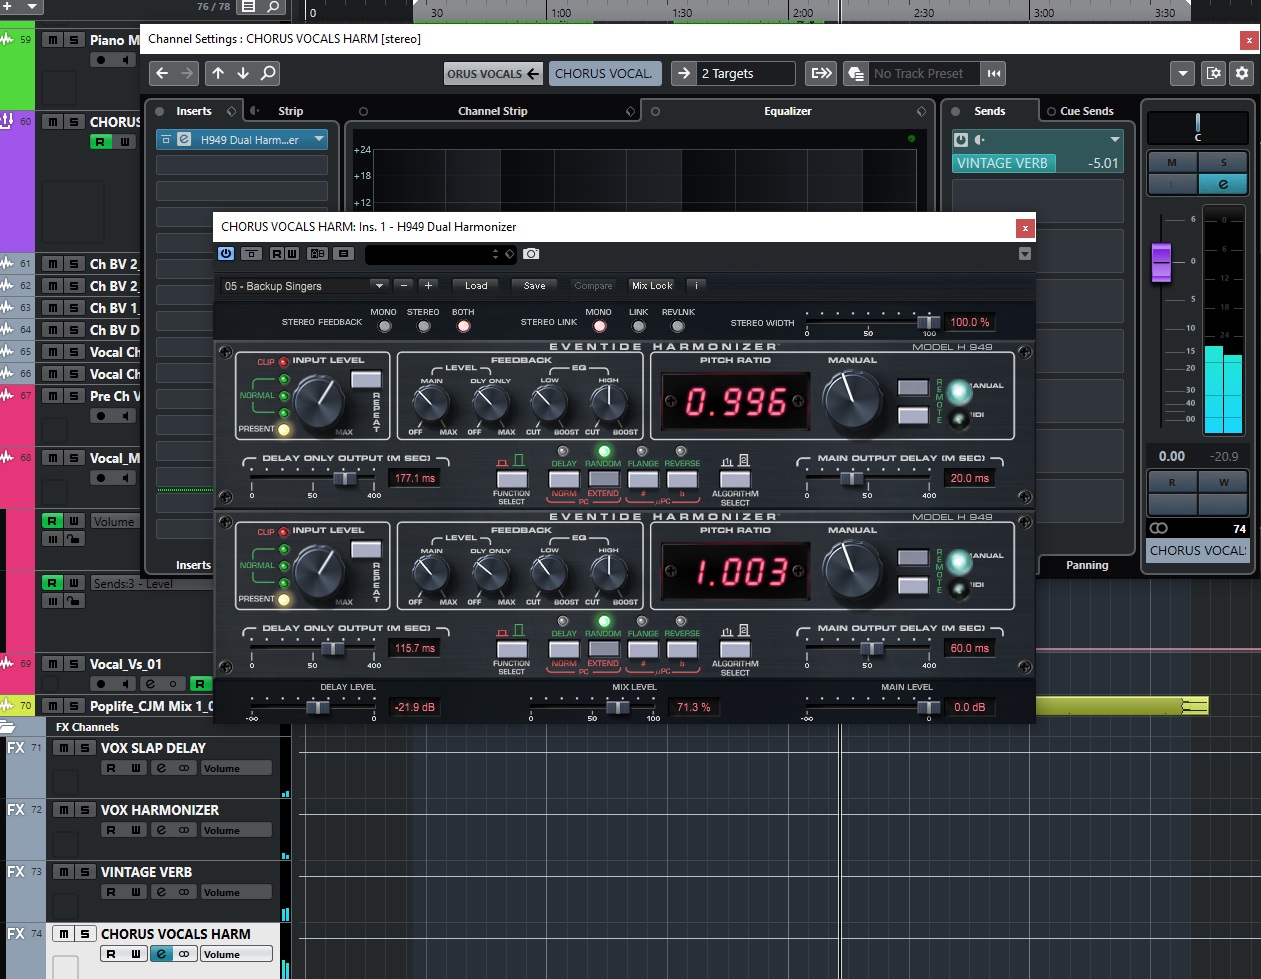
There were 6 tracks of vocals for the choruses. The lead vocal was doubled, and then there is a doubled low harmony, and then another set of doubled harmonies that only sing “poplife”. These needed to cut through the heaviest parts of the song, with all the guitars and everything else going on, so they were pretty heavily processed. They were all bussed to one group channel where I did all the processing. I used the virtual tape emulation, followed by the Virtual Mix Rack which had the console emulation, followed by some tube emulation to add a bit of edge to the vocals, then some vintage 1176 style compression, followed by some EQ to scoop out some low mids and add a bit of bite around 4K. For FX I used the dual H949 Harmonizer plugin from Eventide to blend in some wide doubling type effects.
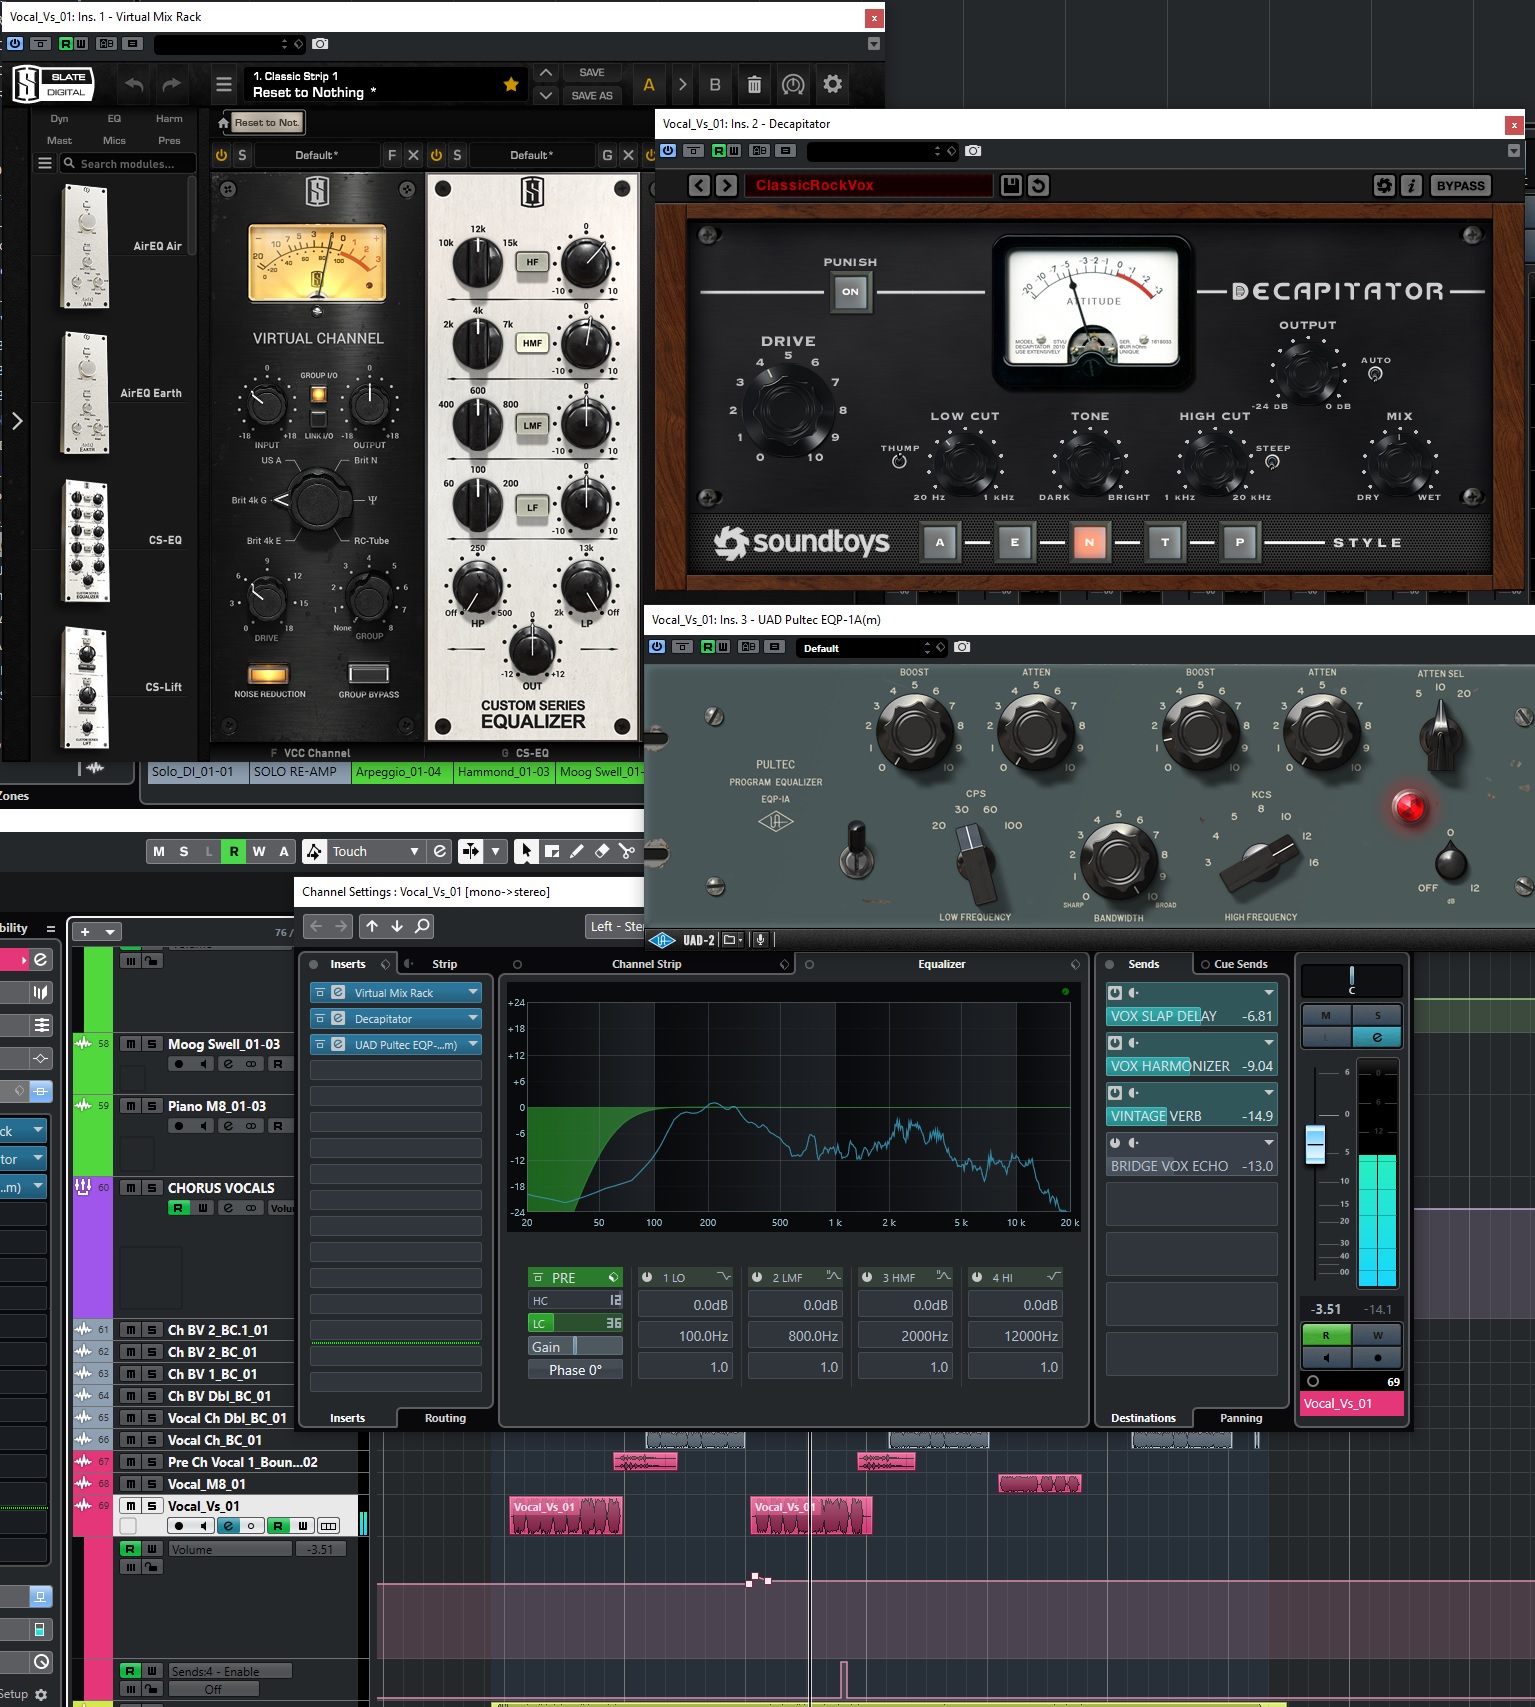
VERSE VOCALS
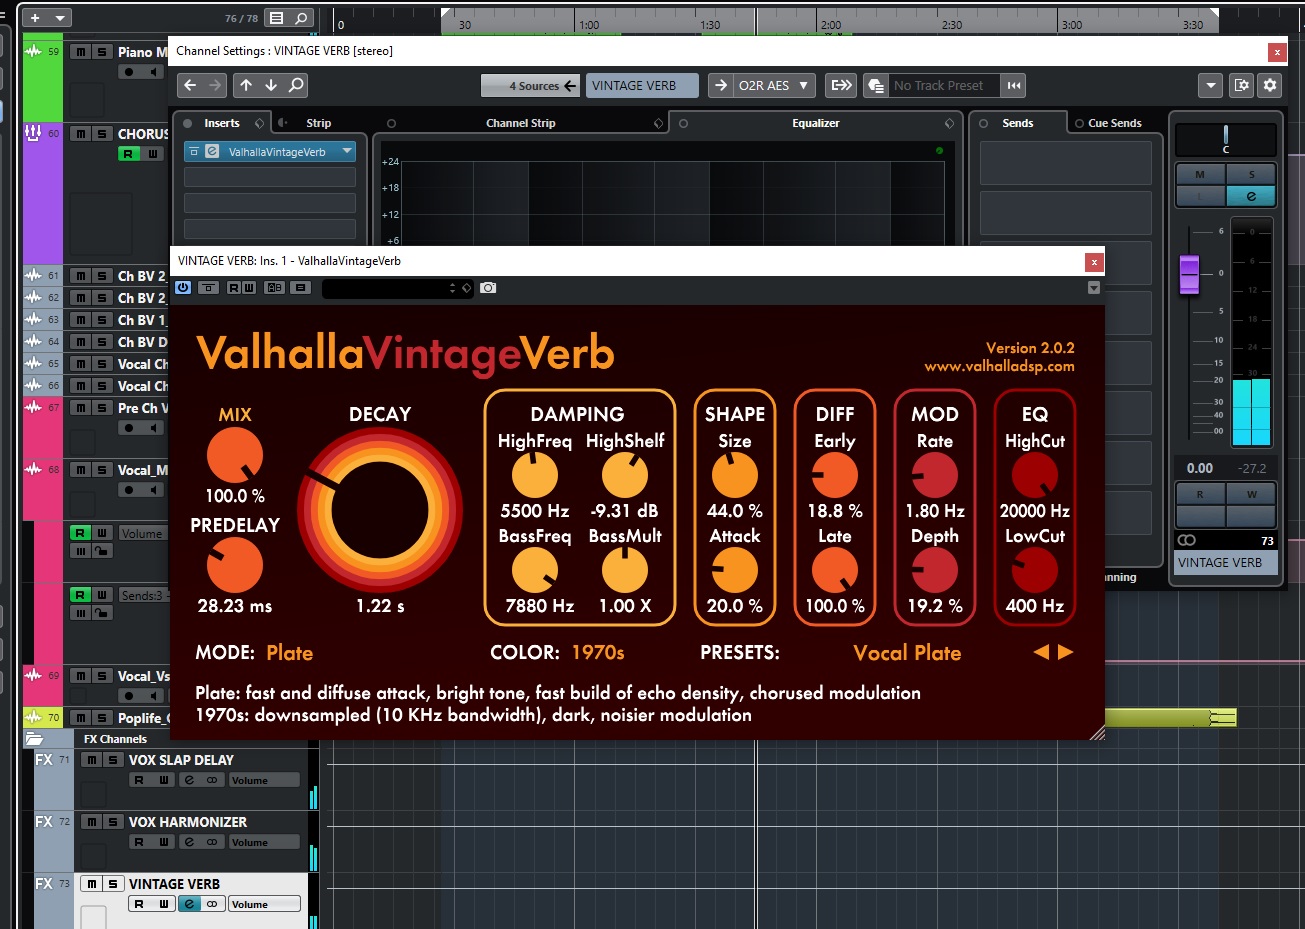
The main verse vocal track sounded pretty good on it’s own, but I wanted to make it a bit more edgy for the “rock” mix. Ran that through the Virtual Mix Rack with the virtual mix channel, and then just the smallest amount of EQ boost at around 4K. Then I ran it through the Soundtoys Decapitator at a 50% mix to give it a bit of saturated edge. I followed that by the UAD Pultec EQ to give it just a tiny amount of extra high end air. Nothing drastic at all. For FX, I used a short slap delay with the Eventide Ultratap plugin, a different instance of the dual H949 harmonizer for some subtle widening/doubling effect, and a bit of short Vintage Verb from Valhalla. The fourth FX was an echo set up for one small phrase in the second verse, and that was automated to turn on only for the words we wanted to echo.
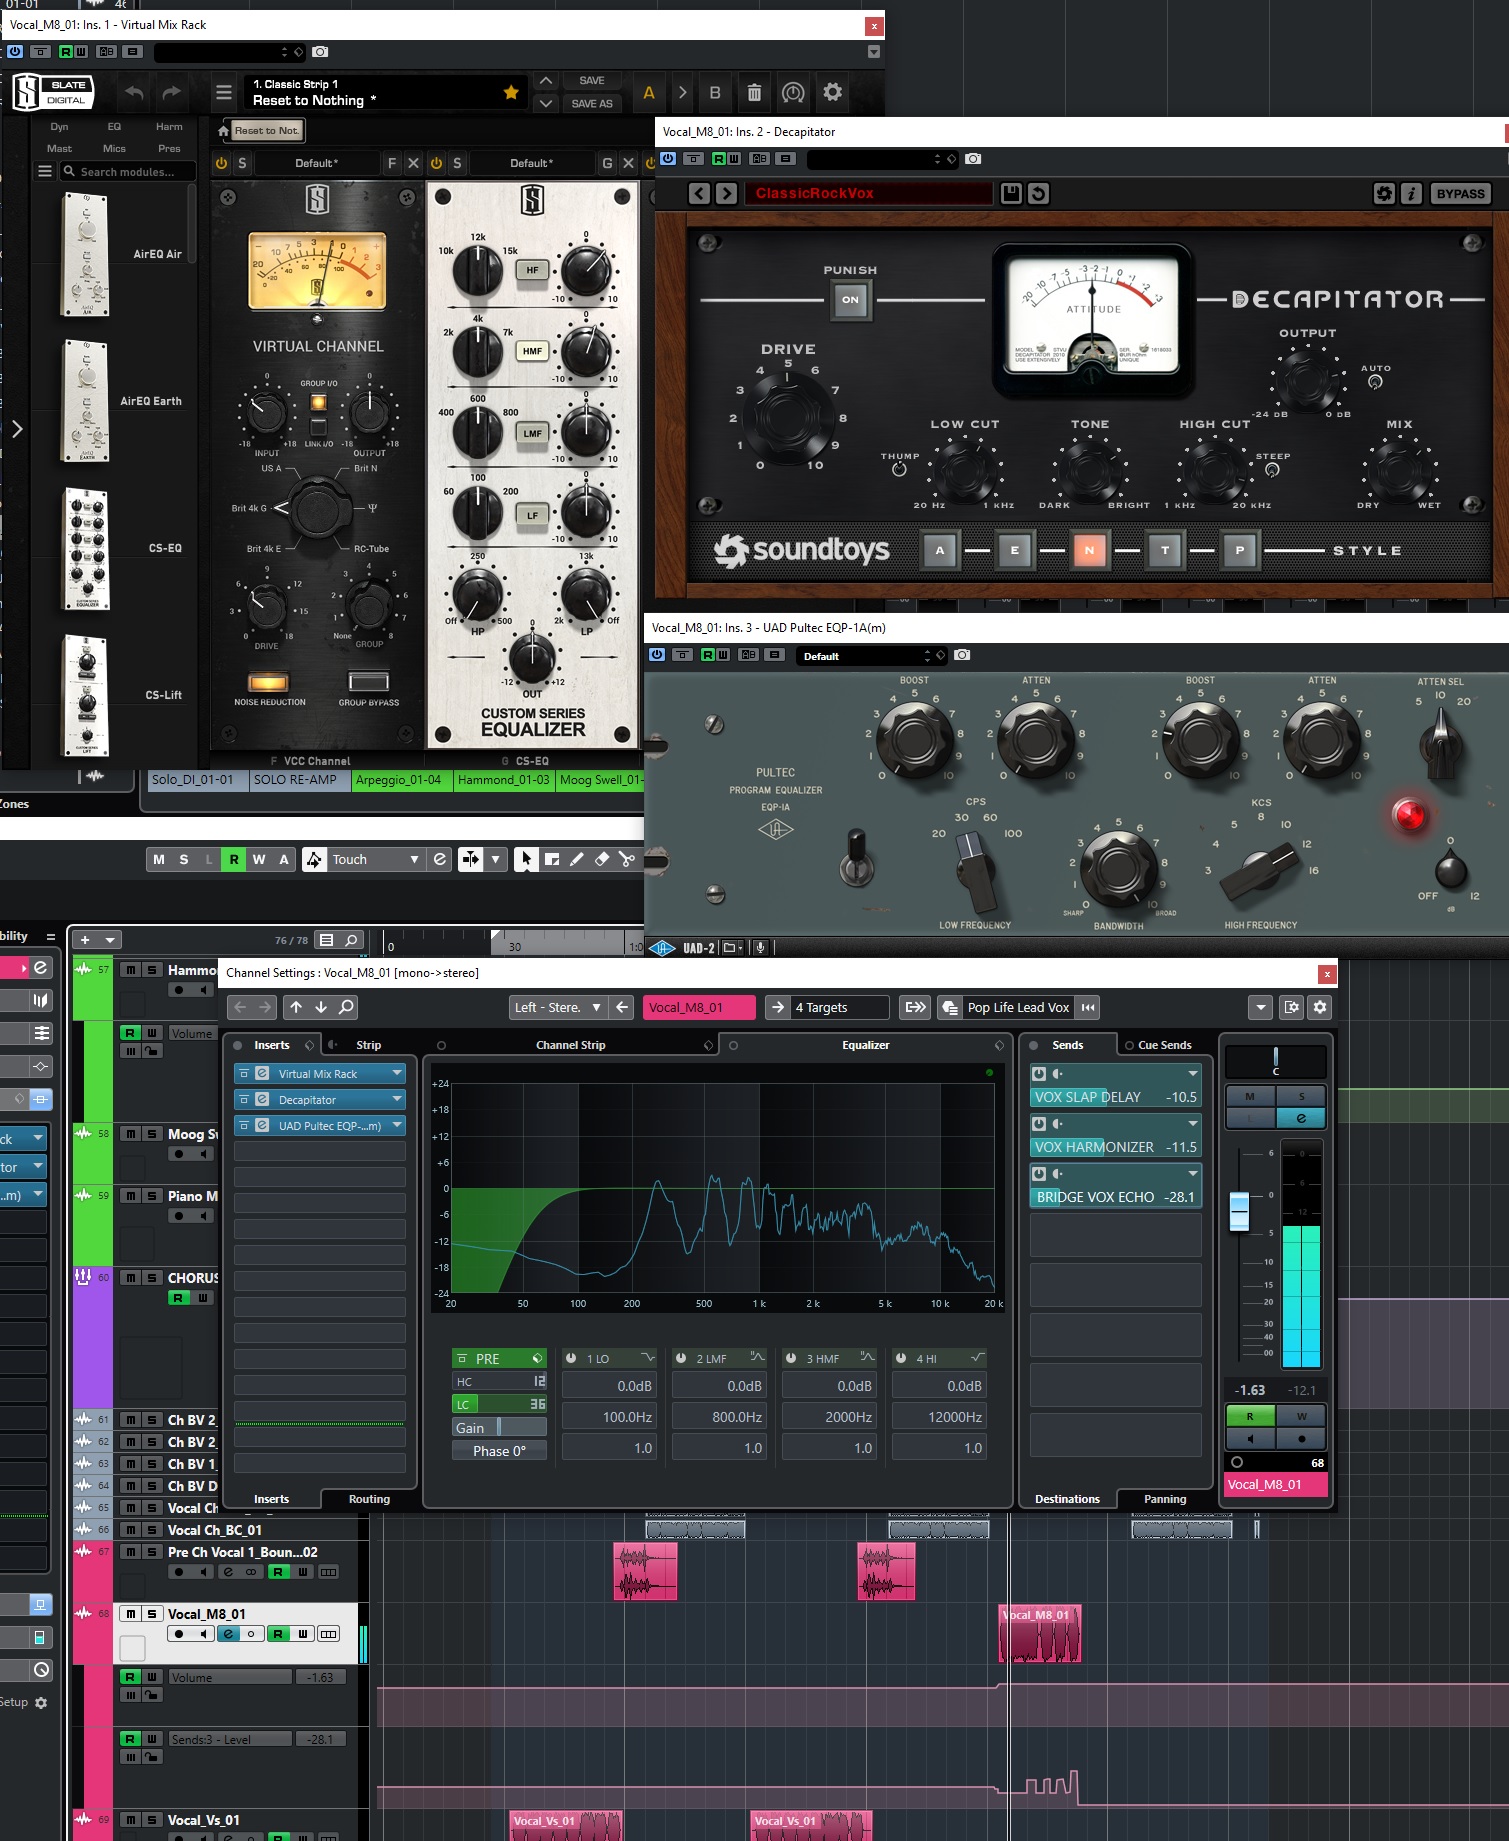
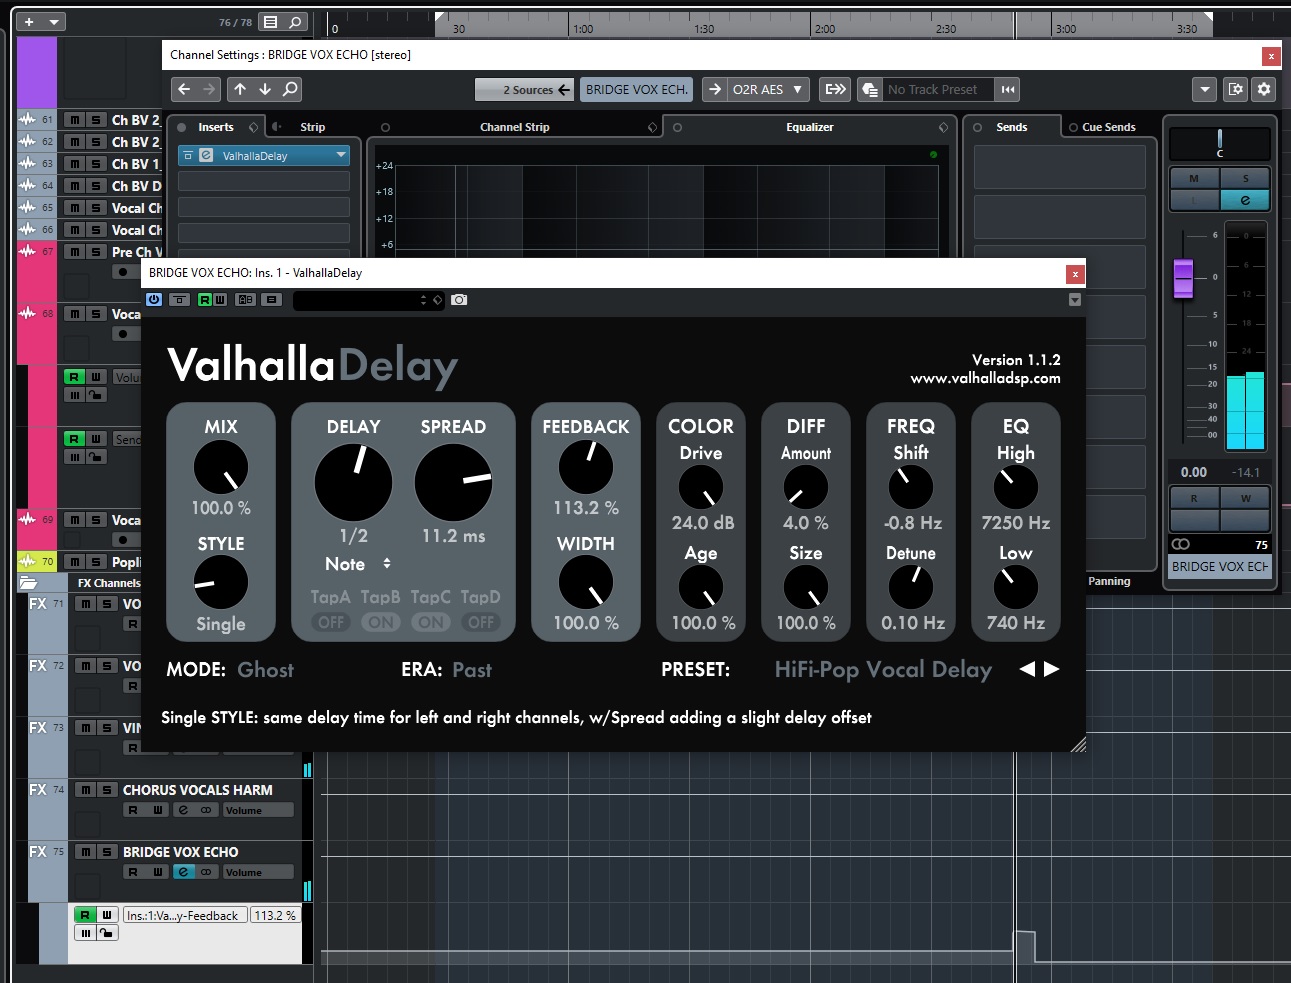
M8 VOCALS
The “Middle 8” bridge vocals were on a separate track, so I kept them separate and processed them slightly differently. The inserts were the same as for the verse vocals, but I tweaked the settings a bit and bumped up the mix on the Decapitator a bit more than in the verses. The other change was a separate longer repeating echo I set up on an FX channel just for the bridge, which was kept low for most of the bridge and then I automated the feedback level on the last couple of words to let them echo out until the guitar solo started, at which time I brought the feedback level all the way down to shut off the echoes.