FREE Mix “Winner” #2
Let Me Be by Mike Wyatt
Mike’s own short self-description:
Solo artist from London, UK. I haven’t ‘properly’ released anything as of yet but plan to be releasing my debut EP/Single in early 2017. At the moment I’ve been focusing on touring all over the UK, and even venturing further afield into Europe and even the US, playing @ The Hotel Cafe in Los Angeles a couple months back – planning to come back to the US a lot more next year.
Check Mike out at these links:
Mixing Notes
This was another song that was a lot of fun to mix, and relatively “easy” to mix since all the tracks sounded very good to begin with (nothing needed “fixing”).
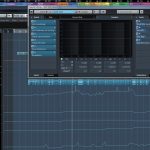
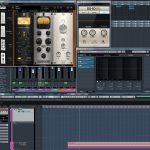
What really drew me into this song was Mike’s voice. I’m not a lyric person, so I’m drawn to interesting voices, as well as melodies and the overall musical arrangement. Mike did a great job with the melody and arrangement, but his voice really stood out. He has a VERY dynamic singing style, which is great, but also posed the biggest mixing challenge. I needed to tame those dynamics without totally killing his style and the vibe of the song. If you look at the screen shots at the end of this post, you’ll see that I used two different compressors on his voice, as well as quite a bit of volume automation to further smooth things out. One compressor is set to a very gentle setting, to just give a bit of overall smoothing, while the second compressor is set a bit more aggressive to really tame the parts where he gets really loud. Then, I further smoothed things out with automation… in addition to riding the overall vocal volume as instruments came in and out and the song built up, there were several loud words that needed a bit more taming than the compression could do on its own, as well as several very soft words that I needed to jack up the volume on. Since the song is relatively sparse as far as instrumentation goes, I didn’t need to get too extreme with the volume rides and compression to keep the vocals on top of the mix.
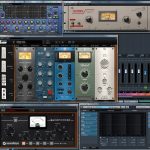
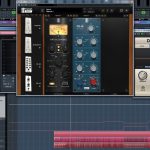
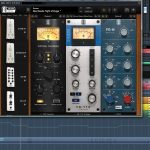
As far as specific processing, the inserts started with the UAD Cambridge plugin to roll off some subs from the voice, to get rid of a bit of rumble in the track as well as to tame a few plosives. That was followed by the UAD LA-2A compressor emulation, which was my gentle overall compression. After that the Slate Digital Virtual Tape Machine (not shown in the screen grab) for some subtle tape emulation. Then the Slate Virtual Mix rack, which initially just had the console emulation, the Neve EQ emulation, and the FG-116 (1176 style) compressor. After the initial mix, Mike requested a bit more low end and body in the voice than I initially had set. So, I tweaked the Neve EQ a bit, and added the Revival plugin as well as the Earth EQ plugin, which I just used to set up a bit of a resonant LoCut filter. After that I used the Elosis DeEsser to tame a bit of sibilance, and then just a touch of distortion to add a bit of edge and more warmth to the vocal with the SoundToys Decapitator (blended in at about 50% dry/wet).
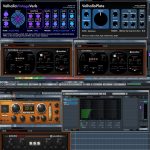
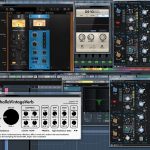
As far as vocal effects, there is also a lot happening there as well. It may look like a lot of effects, but there are all blended in subtly, and you can see there is a lot of automation happening to bring various effects up and down in different parts of the song. There are two different delays. One is a short “dirty” slapback echo (which I edited to make a bit cleaner than the preset I started with) that is automated up and down in various parts of the song. The other delay is a bit longer and the return for it also has some send to the Valhalla Plate reverb to help diffuse those echoes a bit more. Both of those delays are used fairly sparingly and low for most of the mix, but then brought up to be much more audible in the quieter bridge section, for a bit of contrast (at the request of Mike). The main reverb on the voice, which again is kept quite low for most of the mix (but brought up and down with automation) is the Valhalla Vintage Verb, using a kind of 80s smooth plate reverb emulation. Finally, there is a bit of Microshift on the voice, but with a delay inserted before it to separate it a bit more from the dry vocal… that’s just used as a subtle thickening effect.
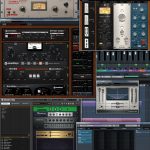
I had a bit of fun with the Bass on this song as well. Since there were only a couple of rhythm guitars to deal with, there was more space than usual in the mix for a nice full bass sound. Even so, the struggle is always to keep the bass audible without it getting too muddy. My favorite technique for this is to add harmonics with distortion, and this song was no different. I was going for a lot of contrast between verse and chorus in this song, and wanted the chorus to be a bit rough and edgy, so I went with more distortion that I normally would, but not to the point where you hear it as a distorted sound. The bass actually has 2 different types of distortion happening. If you look at the screen shot of the inserts, you’ll see a SoundToys effect rack with a Decapitator providing some subtle distortion, followed by some Microshift and a bit of ambient delay to give the bass some “air”. Although that was used as an insert, you will notice the mix levels for each of those, as well as the overall Mix setting for the mix rack, are fairly low… so that was just a very subtle bit of distortion and space that I added that was constant throughout the song.
The main bass distortion, though, is actually on an effects buss, using Native Instruments Guitar Rig 5 with one of their bass amp presets that I modified and added to to get a sound that worked in this song. That was followed by the Waves S1 to really widen that distortion out to the sides of the mix. It’s a very mid-range sound, and I automated the return on that effects send so it’s really mostly present in the loud sections, and very low in the mix everywhere else. That’s usually the key to keep the bass at a good level throughout the mix… as the chorus kicks in with more instruments and everyone is playing louder, the bass will usually get lost in the mix. However, if you simply bring up the volume of the bass track, you will often get too much low end and mud. So, instead you need to bring out more harmonics and bite to let the bass be heard and let the brain fill in the lower frequencies (a psycho-acoustic effect… you could completely filter out the fundamental frequency and only have harmonics, and the brain will still fill in the fundamental). Usually, though, it’s a bit of both, as it was in this song… ride the bass volume a bit along with the other instruments, but also bring out the mids/harmonics/distortion to help it be heard more in the loud sections. If you do it correctly, the majority of listeners will never notice that the tone of the bass has actually changed or that any distortion was added at all.
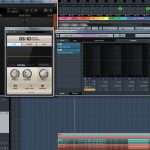
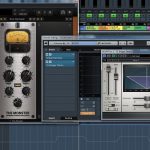
Drums were fun on this song as they were recorded well, with a nice sounding kit and a great drummer, so they didn’t need any fixing or triggering to make them work in the mix. Like many of the other instruments in this song, I wanted the sound to change and get a bit more raw and edgy in the loud sections. For the drums, this was done mostly through bringing the Room mics up more in the loud sections, as well as increasing the blend of the parallel drum compression on the main drum buss by automating the Mix knob on the Slate “The Monster” compressor. Also, I tried out a new plugin on the drums on this mix, which I really ended up liking quite a bit. Usually I will use the SPL Transient Designer plugin on kick, snare, and sometimes Toms and even the main drum buss. This time, I tried the DS-10 Drum Shaper plugin from XLN Audio, and I really liked it. It’s similar to other transient modifier plugins, but it has slightly different settings for Kick, Snare, and Bus, with Attack and Sustain controls tailored to those uses, as well as a “Mojo” knob that did different things for each of those uses. I ended up using it for Kick, Snare, as well as the main Drum Buss, but I also automated the controls on them, bringing the attack up and down in sections, as well as automating the Mojo control. It worked really well for this song.
Screen Shots
- Lead Vocal channel and automation
- Lead Vocal channel inserts
- Lead Vocal FX
- Bass inserts and FX
- Drum Buss
- Kick Buss
- Snare Buss and automation
- Toms Buss and channel inserts
- Overheads Buss and Automation
- Room Buss and Automation
If you think you have a really great song that I would enjoy mixing, please use the Free Mix Submission form on my mixing web site.
